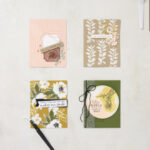
Four Embossing Techniques You Can’t Miss

Whether you’re a beginner or an expert crafter, there are always new crafting techniques to discover and perfect. In this post, we focus on four embossing techniques you can use to level up your crafting ability.
Crafting Technique: Different Ways to Emboss
Embossing is a crafting technique that creates a raised surface on a material. It is a terrific way to add more layers and dimension to your paper crafts. As with many crafting techniques, there are different approaches to embossing, including embossing paste—a thick, creamy paste—and embossing powder—a fine, ground resin.
Things You will Need
To get started, you may need some of the following supplies:
How To Emboss: Four Different Techniques
With multiple ways to emboss, the creative possibilities are endless. If you’re ready to turn up the heat by adding more texture and dimension to your paper crafts, consider trying one of these embossing techniques in your next project.
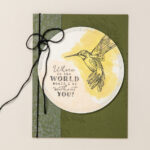
Create Dimension
One easy way to use embossing paste to add dimension to your next card is to layer it with your favorite stamp. In this example, the hummingbird and sentiment are stamped using StazOn Ink to prevent smudging. Then, the embossing paste is mixed with ink and applied in a thin layer over the stamped images for artistic flare.

Paste It
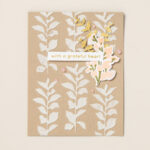
Embossing paste can also be used to create textured backgrounds on projects such as cards, scrapbook pages, or gift tags. You can create this effect by using a decorative mask or by creating your own stencil using your favorite dies.

Here, the background of the card was made by creating a paper stencil using the Textured Floral Dies set. From there, embossing paste was applied over the stencil to create a textured background.
Create Intricate Backgrounds
Using embossing powder to create detailed backgrounds on your next card is a great way to make it one of a kind.
If you’ve never used it, here’s a quick rundown on how to use embossing powder:
- Stamp your design – There are two kinds of ink that we recommend for use with embossing powder (see below). Stamp your ink of choice onto your design.
- VersaMark is clear, tacky ink with a strong hold.
- White Craft Ink gives a bold, bright touch.
- Add your powder – Immediately after stamping your design, sprinkle some Wow! Embossing Powder onto the wet ink. Shake or tap off the excess powder.
- Turn up the heat – Watch your image come to life as you use our Heat Tool to melt and solidify the embossing powder.
Pro tip: For even better results, use our Embossing Additions Tool Kit which includes an Embossing Buddy for crystal clear stamp results, the Powder Pal to capture all your excess powder to add back to your jar, Crafting Tweezers to keep your fingers away from the heat, and a Crafting Brush to clean up your excess powder around your stamped image.

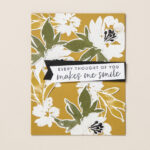
This card uses embossing powder, layered with die cut elements to create a beautiful design. First, the flowers are stamped using White Craft Ink and then sprinkled with white embossing powder and set with a Heat Tool. Once the background is complete, the leaves are stamped, die cut, and added to the card for a multi-dimensional design.
Layer Up
One fun way to use embossing powder is to stack multiple layers to create drama. The tag on this card is an excellent example of this crafting technique.

First, half of the tag is stamped with VersaMark Ink, sprinkled with Wow! Embossing Powder, and set with a Heat Tool. This process is repeated a couple of times to add depth to the design. Before the final layer is fully set, a stamp is used to create an impression in the layered embossing powder.
Ready For More Inspiration?
If these embossing tips have you craving more craft ideas, we have a dedicated network of crafters ready to work with you. Reach out to a Stampin’ Up! demonstrator today for help with your next crafting technique.