Technique Tuesday: Easy Bokeh Background

You might wonder why this Technique Tuesday is focused on something that isn’t at the forefront of your DIY craft, but when you see the effect this easy bokeh background has on a project, you won’t think twice!
Background patterns and colors have a massive impact on the rest of your paper craft. Not only can they be visually striking, but they also add texture, and they really do the heavy lifting when it comes to making your focal elements pop.
And the best part is that going back to basics with some of these fun crafting techniques will help you elevate all your DIY crafts, from handmade greeting cards and scrapbook layouts to party invitations, gift wrap, and more!
Now the question really is—what is an easy bokeh background and how do you create one? Follow along with this simple craft tutorial to find out!

How to Create an Easy Bokeh Background for Handmade Cards
Bokeh is the pattern created in the background of a photo when something is slightly blurred or just out of focus, particularly lights. Think of a lit Christmas tree behind the family in a holiday portrait! The effect is slightly ethereal and dreamy, simultaneously able to blend into the foundational imagery of a photo or paper craft and give the entire project a visual boost.
And believe it or not, creating this effect yourself is simpler than it may seem. Let’s walk through the steps of creating an easy bokeh background for your next paper craft project!
Before You Begin: Gathering Supplies
Before you’re ready to begin creating your bokeh pattern, you need to gather a few basic crafting supplies.
Step 1: Masking and Spritzing
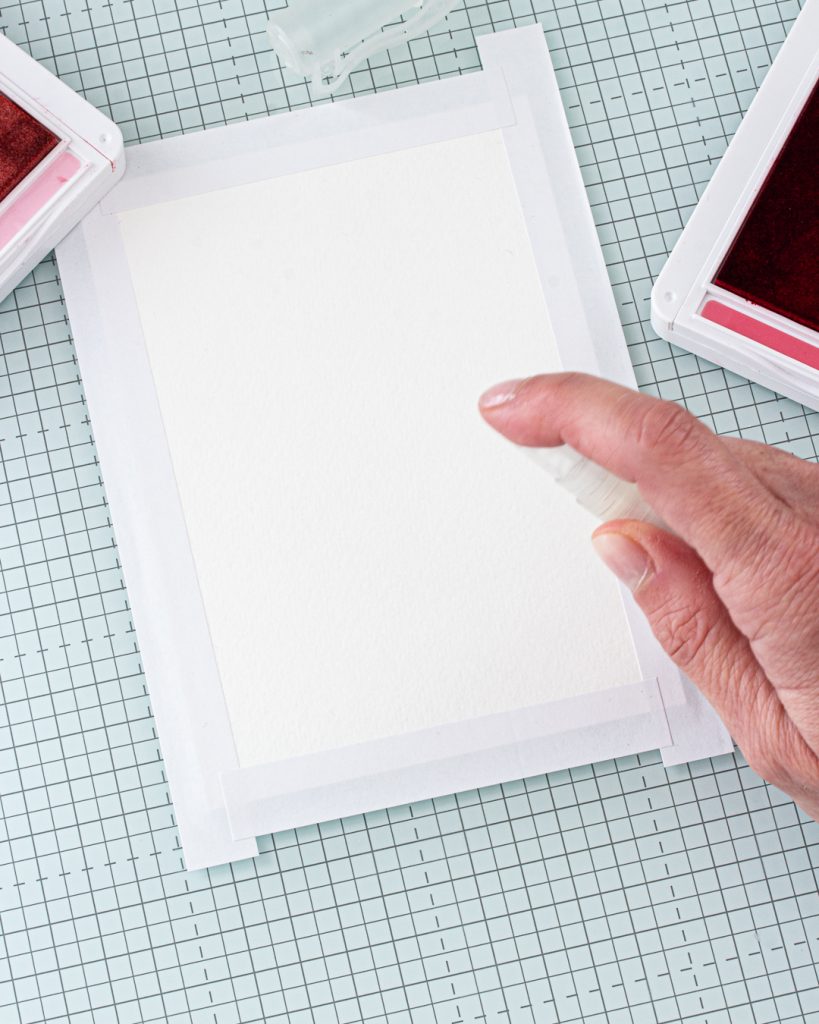
The first step in creating your easy bokeh background is to set up your project for success. Having cut out your watercolor paper to your preferred size, you’ll tape it to a smooth work surface using Stampin’ Up! Masking Paper. This not only helps prevent the edges of your paper from curling, but can also serve as a clean barrier, creating a white border around your pattern.
Next, use your Stampin’ Spritzer to spray just enough water on the surface of your paper to make it shiny, without oversaturating it. You don’t want your ink to run, just blur.
Step 2: Ink Blending
Now the real fun begins! Choose three complementary ink pad colors to create the foundational backdrop for your bokeh pattern—one light, one medium, and one dark. Starting with your lightest shade, you’ll use a direct-to-paper technique, gently pressing your ink pad to the watercolor paper at random. Don’t worry about even spacing as natural variation is part of the charm here.

Follow the same step with your medium and dark ink pads, allowing the colors to overlap and blend on the paper. Once finished, if desired, you can use coordinating watercolor pencils to blend and add even more depth.
Step 3: Masking Circles
This step is where the bokeh effect really shows through. Using a variety of sized (we think three works best) circle dies and masking paper, make paper stencils. Make sure to keep the stencil big enough to prevent inking outside the lines—you want that perfect circle shape here. Then load your Sponge Dauber or Small Blending Brush with white ink and dab circles onto the colorful background. You’re looking to create a range of depths and intensities, so vary the ink coverage and overlap of your circles.

And that’s it! Once you’ve given your bokeh background time to dry, remove the masking paper from the edges and complete your paper craft!
Shop the Technique Today!
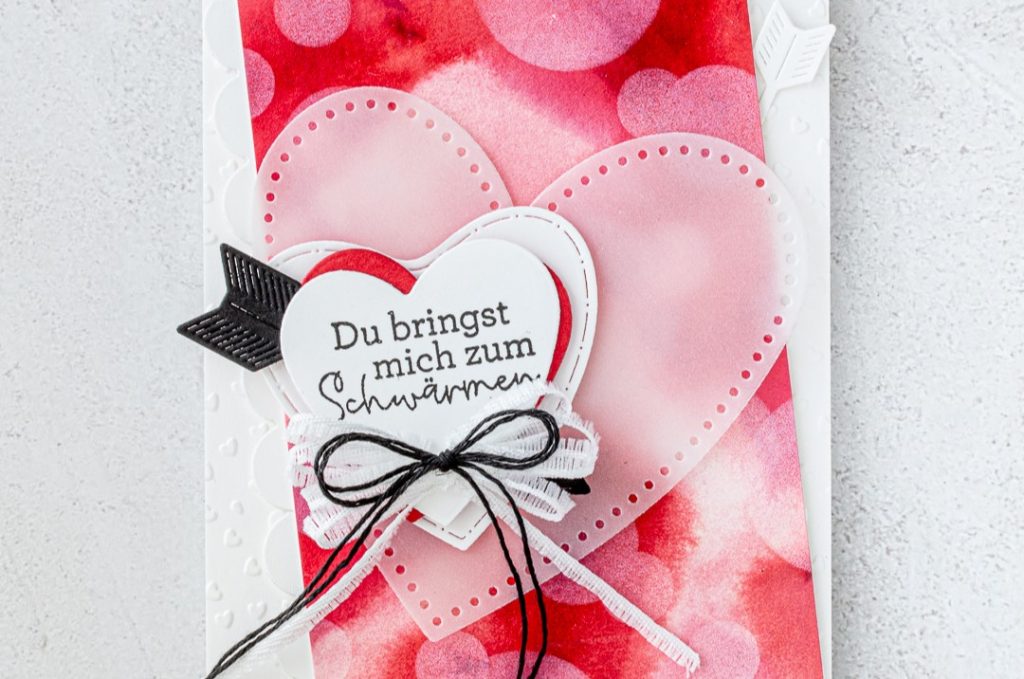
Not sure where to go next with your newly created easy bokeh background? Well, for the particularly adorable card highlighted here, our talented Artisan Design Team member Cornelia Janssen used the Classic Stampin’ Pads in Real Red and Pretty in Pink, as well as the VersaMark Pad for extra tone-on-tone effect. She layered it up with shapes die cut from cardstock using the Endless Love Dies and Stylish Shapes Dies, then adorned it with some sweet ribbons as a final touch.
And if you want to create something similar, you can shop these products (or more from Stampin’ Up!) as a great next step! They’re versatile, easy to use, and high quality, so you know you’re investing in plenty of beautiful paper craft projects to come!