Technique Tuesday: Dry Embossing


Ready to take your DIY crafts to the next level? Dry embossed patterns are your ticket. Kim Fee, an Artisan Design Team Member, enhances her dry embossing patterns with watercolor pencils to add soft color, enhanced shading, and beautiful dimensional effects to her DIY craft making. You can see her dry embossing techniques on our Technique Tuesday Instagram series.
What You Need to Emboss and Enhance
If you’re ready to try your hand at embossed card making, we’re here to support you, but before you start, make sure to gather your supplies:
- A 3D Embossing Folder – This specialized crafting tool is used to create raised textures on paper or cardstock. Place your cardstock inside the 3D embossing folder and run it through a die-cutting or embossing machine, which presses the design into the paper. The result is a raised design that you can both see and feel. Depth and detail are what separate 3D embossing folders from standard embossing folders. 3D folders create multiple layers (instead of a single-level impression) of raised areas, giving your project a layered, more dimensional look.
- Cardstock or Paper – Cardstock is the perfect choice for your DIY cards because its thicker weight embosses without tearing or warping, giving your card a clean, professional look. Quality, thicker-weight paper also absorbs ink and color better, making it easier to color the embossed design once it’s raised. Pro tip: lightly spritz your paper with water before embossing to loosen up the fibers for a more even emboss.
- Stampin’ Blends Alcohol Markers – Use these alcohol-based markers to add vibrant colors to your embossed designs. These markers are especially good at coloring raised areas because the ink blends easily and brings out the natural texture of the embossing. Use the markers to add depth, shading, or bold pops of color to make the original design stand out.
- Watercolor Pencils – While alcohol markers bring bold color to your design, watercolor pencils offer a softer, more artistic way to add color to embossed cardstock. You can apply them dry for a soft, subtle look, or activate them with water for a washed, painted effect. They’re perfect for highlighting embossed details if you want to keep the overall design light and organic.
How to Enhance Your Dry-Embossed Pattern
Step 1: Emboss card
Use a standard or 3D embossing folder and a Stampin’ Cut & Emboss Machine to emboss your pattern onto your cardstock.
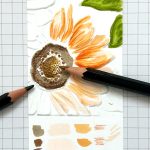
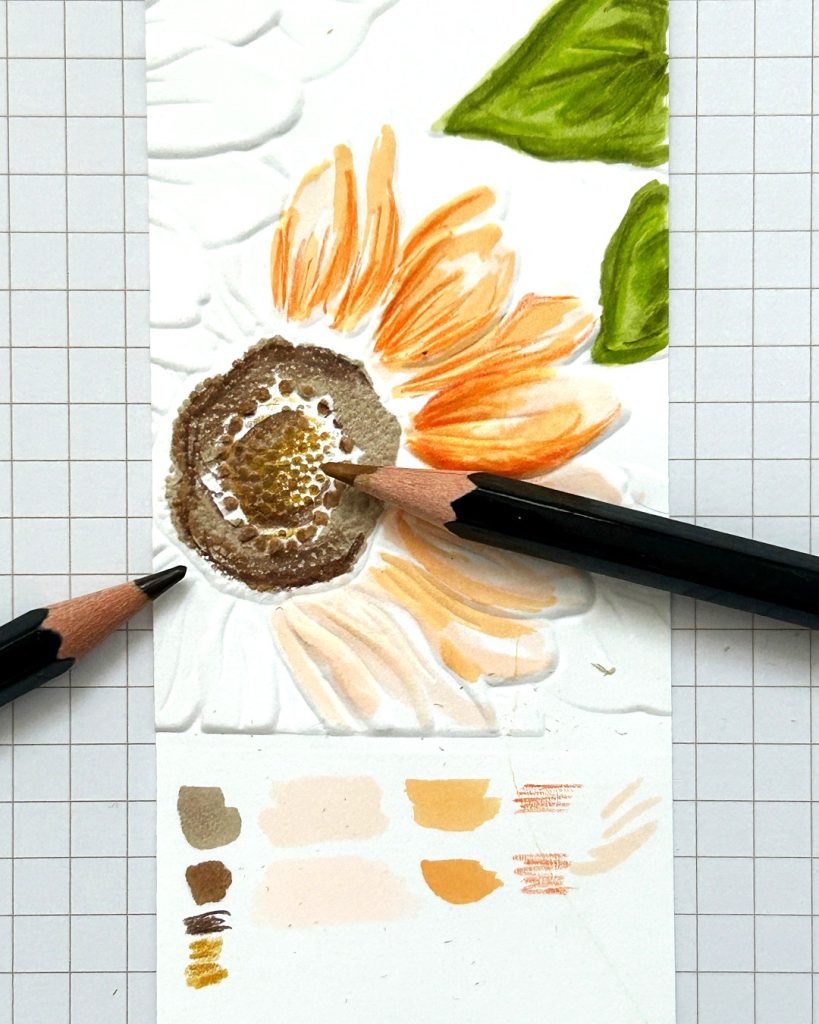
Step 2: Create a color swatch for reference
This is not only fun, but essential. Creating a color swatch helps you test blending and color combinations without pressure to get it right the first time. When creating the color swatch, experiment with different strokes, textures, and hues of each color to find the perfect combination for your pattern. Taking a few minutes to swatch saves time and prevents mistakes. It’s also fun, creative play!
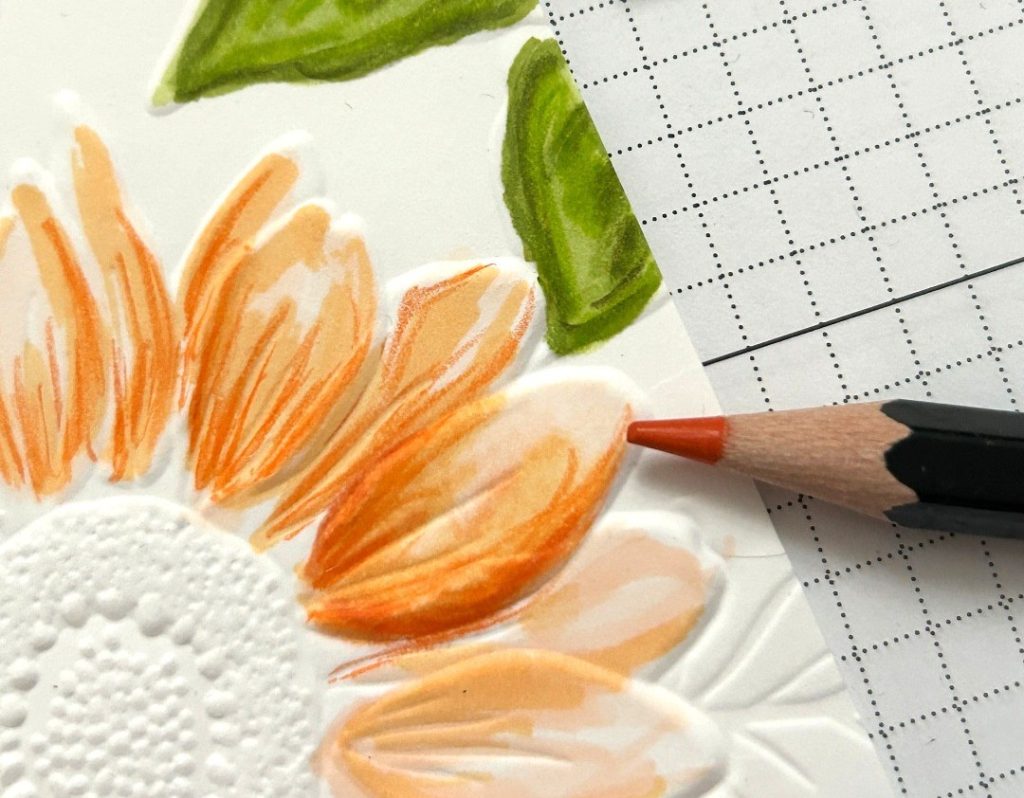
Step 3: Use markers to color raised areas of the patterns
Use your markers to gently color in the raised areas of the embossed pattern (alcohol markers are great for adding color). Pro tip: Color in the direction of the pattern to avoid smudging your work.

Step 4: Highlight and shade with colored pencils
Once your project is dry, it’s time to use your colored pencils to highlight the texture of your pattern by adding fine details and highlights. Use your color swatch for reference. Crafters often use a white colored pencil to highlight specific details. You can also use your pencils to add subtle shading in areas where your marker couldn’t quite reach.
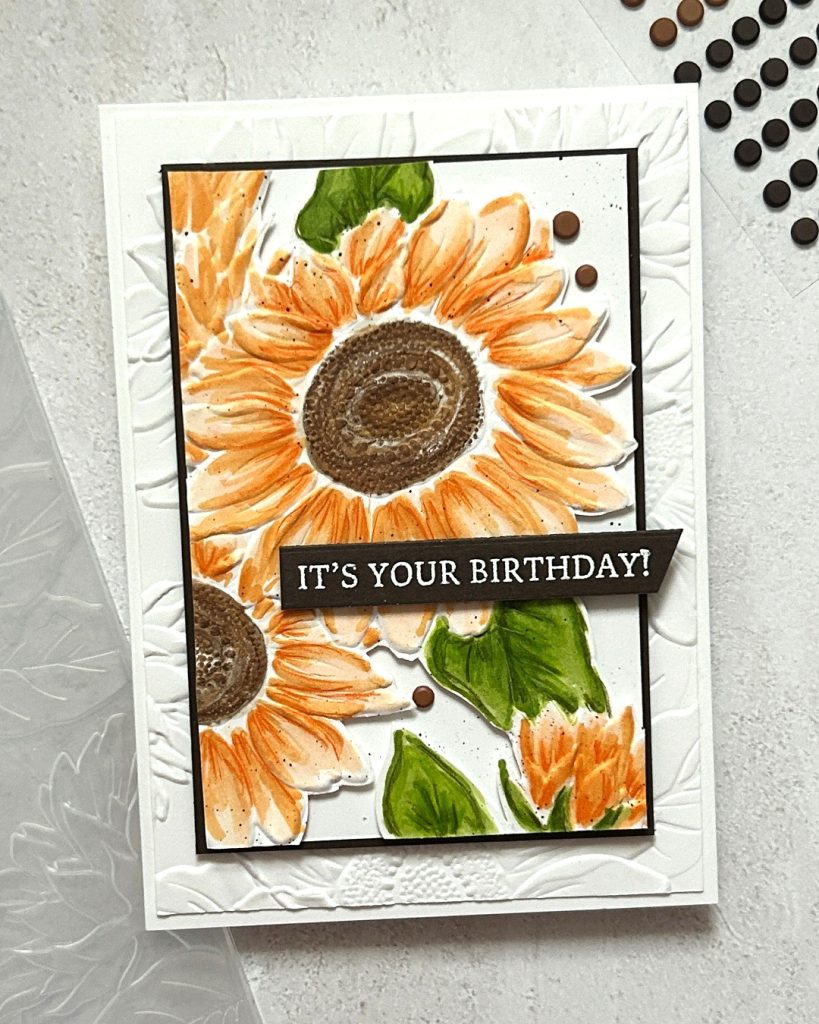
Flat Is Boring. Let’s Emboss It!
Embossing is an easy way to add texture, depth, and color to your handmade cards and paper projects. With just a few simple tools, like this Sunflower 3D Embossing folder, you can transform plain cardstock into a standout design that feels one-of-a-kind. Whether you’re new to dry embossing or refining your technique, these simple steps can elevate every card you create. But be sure to check out our other Stampin’ Up! Technique Tuesday guides on Instagram or Facebook for helpful how-tos and creative inspiration.