Making Gift Boxes from Greeting Cards


Obviously, we’re in the business of making cards. We love cards because they create connections, deliver messages, and are a creative outlet for many people. But cards can be more, especially when you use them in clever, unique ways.
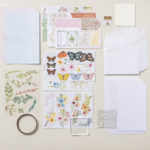
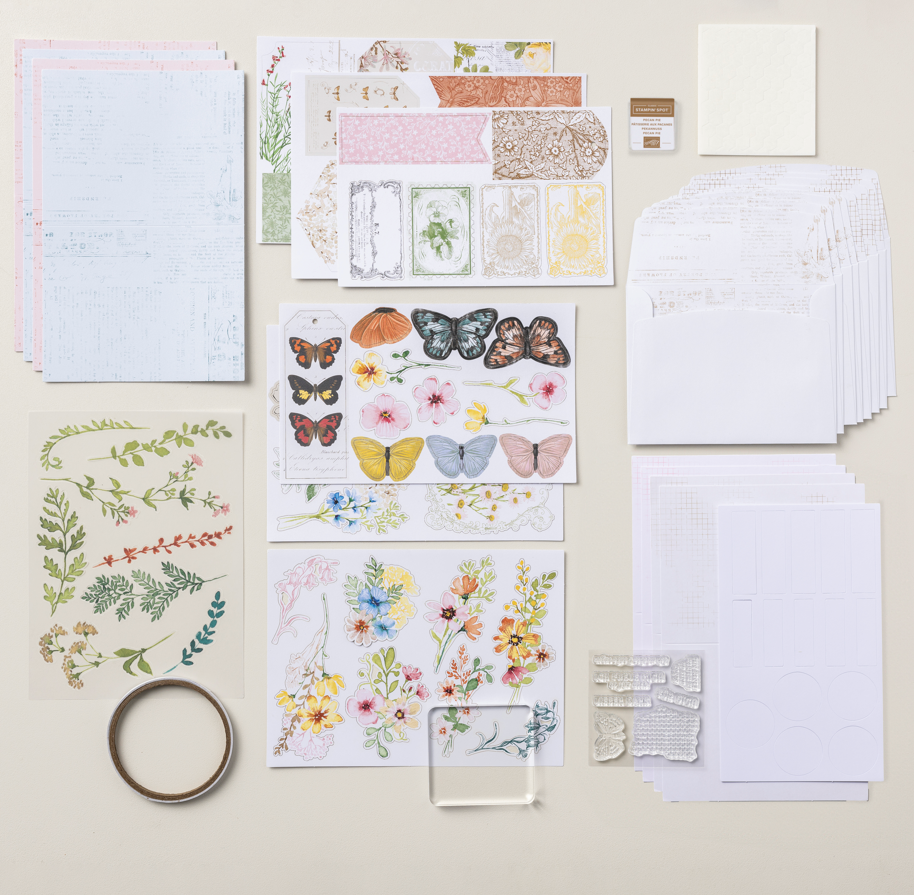
Today, we have a tutorial for how to use a card base to make a gift box using some of our favorite products from the Heirloom Arrangements Kit.
Don’t have the Heirlooms Arrangements Kit? Don’t worry! You can use this tutorial and a card base to create your own version. In fact, we would love to see how you create your own gift box from a card using whatever you have on hand—share your project on Instagram using the hashtag #CreativeChallengeSU.
How to Create a Gift Box From a Card
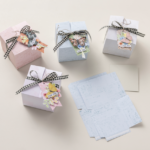
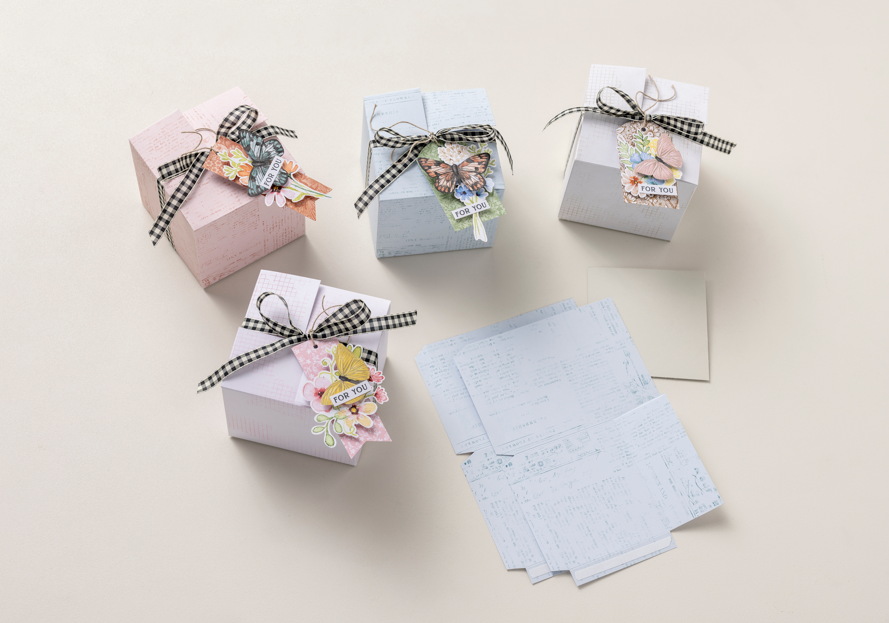
We love these gift boxes, and if you follow the steps below, you can create your own! Coordinate your gift box with your card, and you’ve created a whole gifting experience!
Products Needed:
- Heirloom Arrangements Kit
- Basic Beige Cardstock
- Tear & Tape Adhesive
- Black & Very Vanilla Ribbon
- Baker’s Twine Essentials Pack
- Paper Snips Scissors
You can see how we made these boxes in the video below:

Instructions:
- Stamp the grid image (found in the Heirloom Arrangements Kit) in tone-on-tone color (using different shades from the same color family) on the back of the Pretty in Pink and Crumb Cake cards, stamping off first. (The Blueberry Bushel and Cajun Craze cards are already printed on the back.)
- With the printed side facing up, score the 8-1/2″ x 5-1/2″ (22 x 14 cm) card bases at 1/2″ (1.3 cm), then cut at 8″ (20.3 cm). Rotate cards clockwise one quarter turn and score at 1/2″ (1.3 cm) and 3-3/4″ (9.5 cm).
- Rotate cards back and cut 1-3/4″ (4.4 cm) down from the top edge of the card on the existing centre score line. Cut a 1/2″ x 1-3/4″ (1.3 cm x 4.4 cm) piece out of the top right corner. Cut a 1/2″ x 1/2″ (1.3 x 1.3 cm) square from the bottom right corner and an additional diagonal notch off the bottom right corner. Cut a triangle notch out of the bottom 1/2″ (1.3 cm) tab at the existing centre score line. Cut a small diagonal notch out of the bottom left corner. Fold on all the score lines.
- Cut a piece of Basic Beige Cardstock to 3-3/4″ x 3-3/4″ (9.5 x 9.5 cm) for the bottom of each box.
- Add Tear & Tape Adhesive to the bottom 1/2″ (1.3 cm) tabs and right edge 1/2″ (1.3 cm) tab on each card and assemble the boxes, using two cards for each box.
- Tie ribbon around each box. Create gift tags using kit contents and tie them to the ribbon using twine from the Baker’s Twine Essentials Pack.
Gift Boxes: Make the Most of Your Crafting Supplies
When it comes to paper crafting, if you can imagine it, there’s probably a way to make it a reality. Ultimately, that creative spark, the moment you think “maybe I could…” and then make it happen, is the reason we love crafting. Dust off those creativity skills and see how you can repurpose your existing supplies to create something completely new by trying our tutorial for making a gift box out of cards. Then, show us! We believe that the Stampin’ Up! community is one of the best crafting communities, both online and in person. Share your project on Instagram using the hashtag #CreativeChallengeSU, and get the celebration, support, and inspiration from joining the community.
We host a new Creative Challenge each month. You can share your project on Instagram using the hashtag #CreativeChallengeSU to receive celebration, support, and inspiration from the community.