How to Use Masking Paper | Creative Card Making Tips


Masking paper is a game-changer for anyone who loves card making, scrapbooking, or just getting creative with papercrafts. Whether you’re layering stamps, blending inks, or creating intricate backgrounds, a little piece of masking paper can take your designs from “cute” to “wow!” in no time.
Masking paper is essentially your secret weapon—it allows you to protect areas of your project while you work on others, giving your cards more depth, dimension, and that professional, layered look. Plus, it’s super versatile, making it perfect for everything from DIY card backgrounds to complex mixed-media projects.
How to Use Masking Paper
Using masking paper might sound fancy, but it’s actually beginner-friendly, and once you get the hang of it, your creative options multiply. In this video, we’re walking through three core masking techniques that every papercrafter should know.

Layered Stamping
Layered stamping is all about creating depth with overlapping images—and masking paper makes it a breeze. Here’s how:
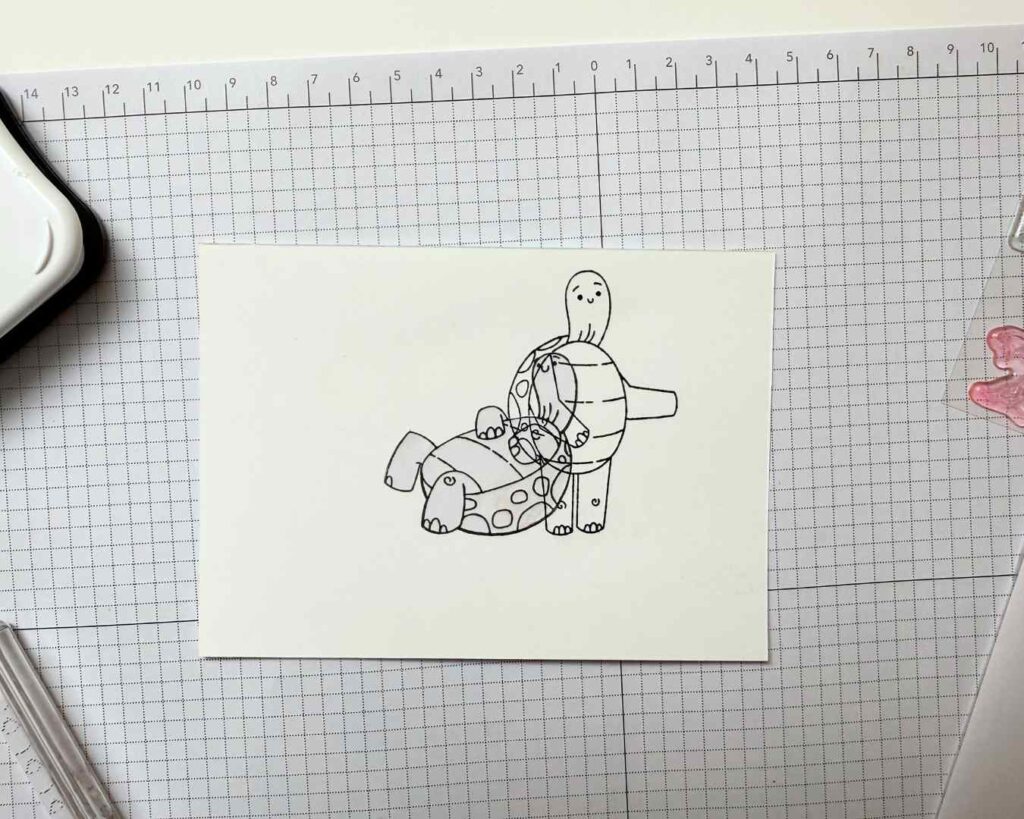
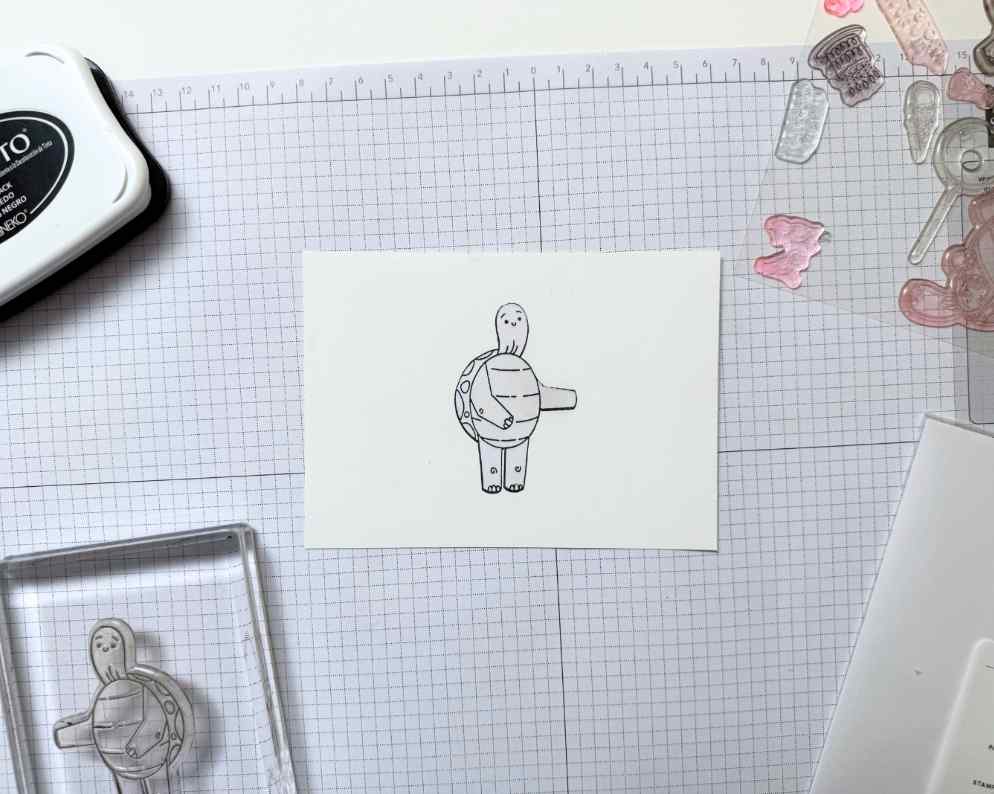
1. Stamp your first image on your cardstock (what you want to appear in the foreground, the zebra on the finished card below, or this turtle, for example.
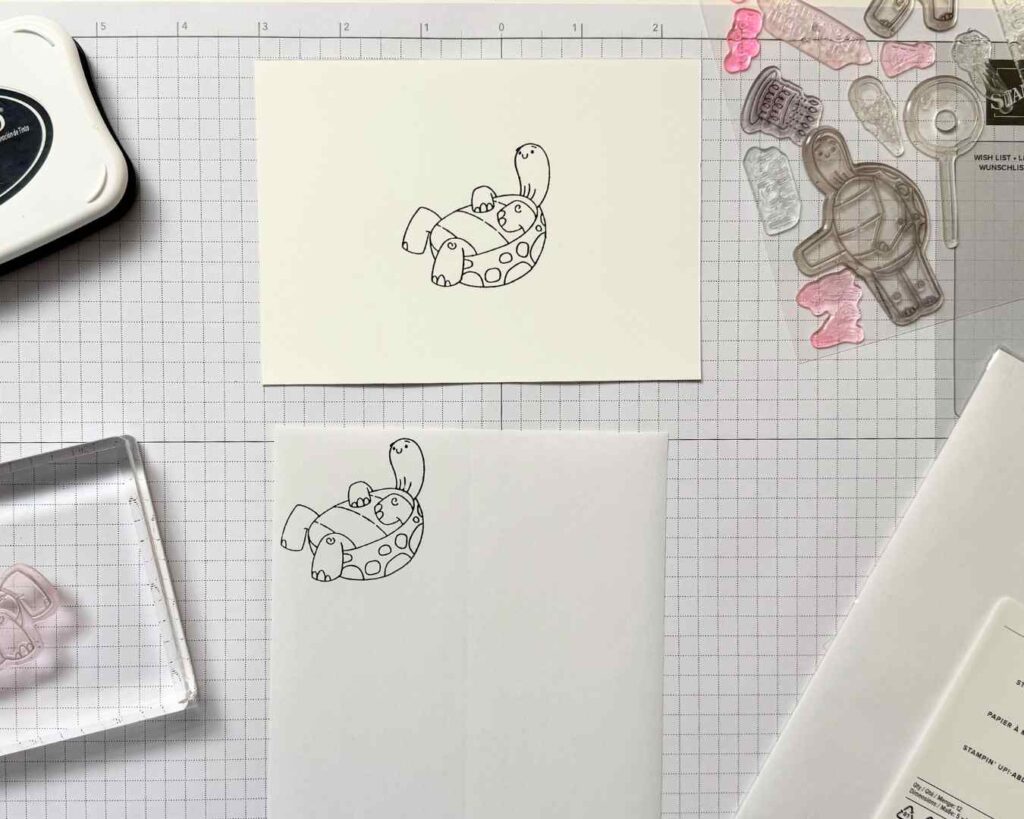
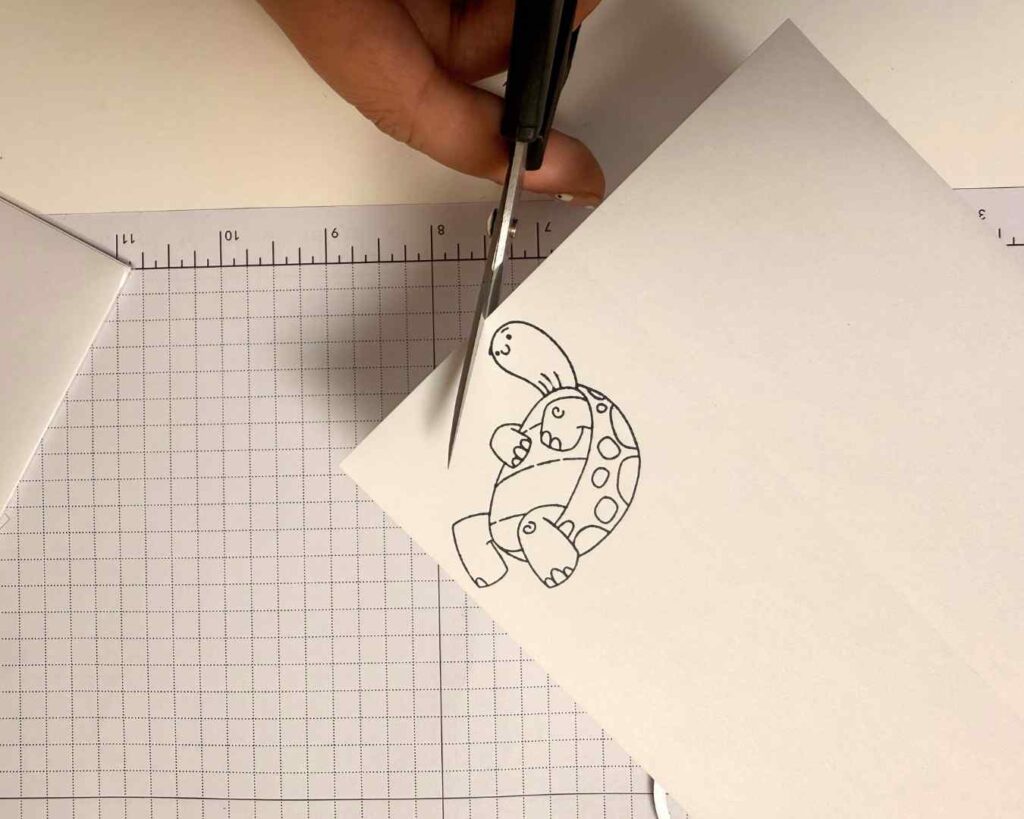
2. Then, stamp the same image onto the masking paper and trim it carefully around the edges of your stamped image, as close as possible.
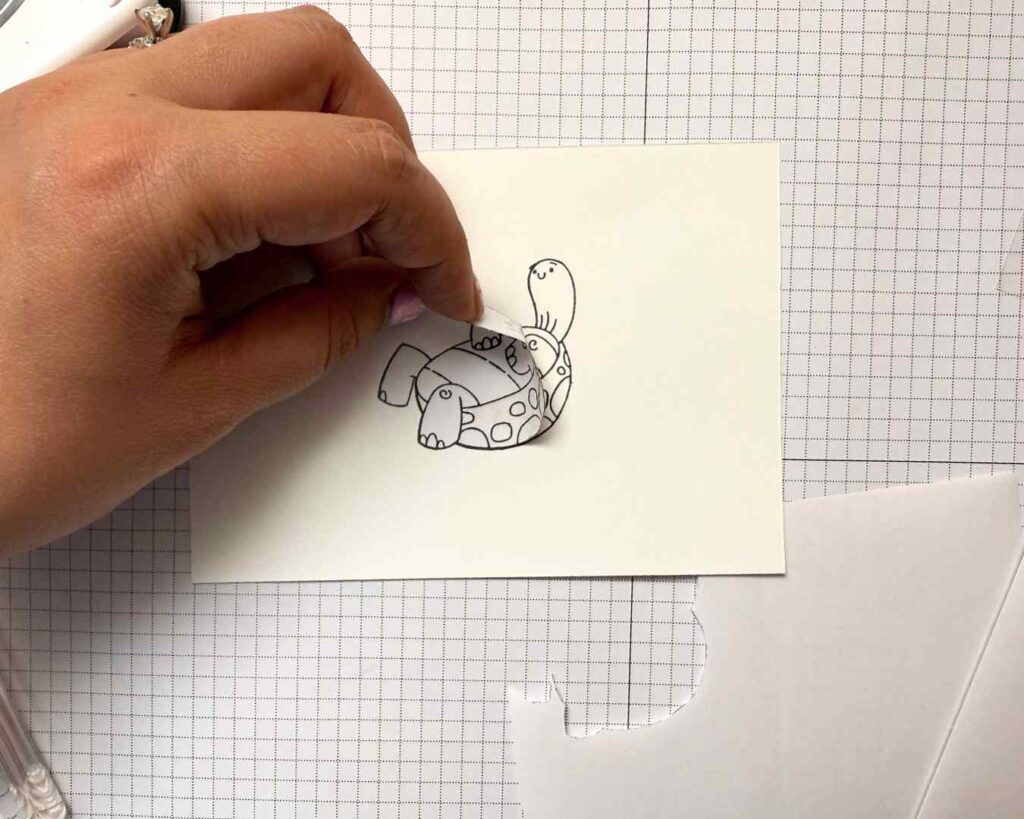
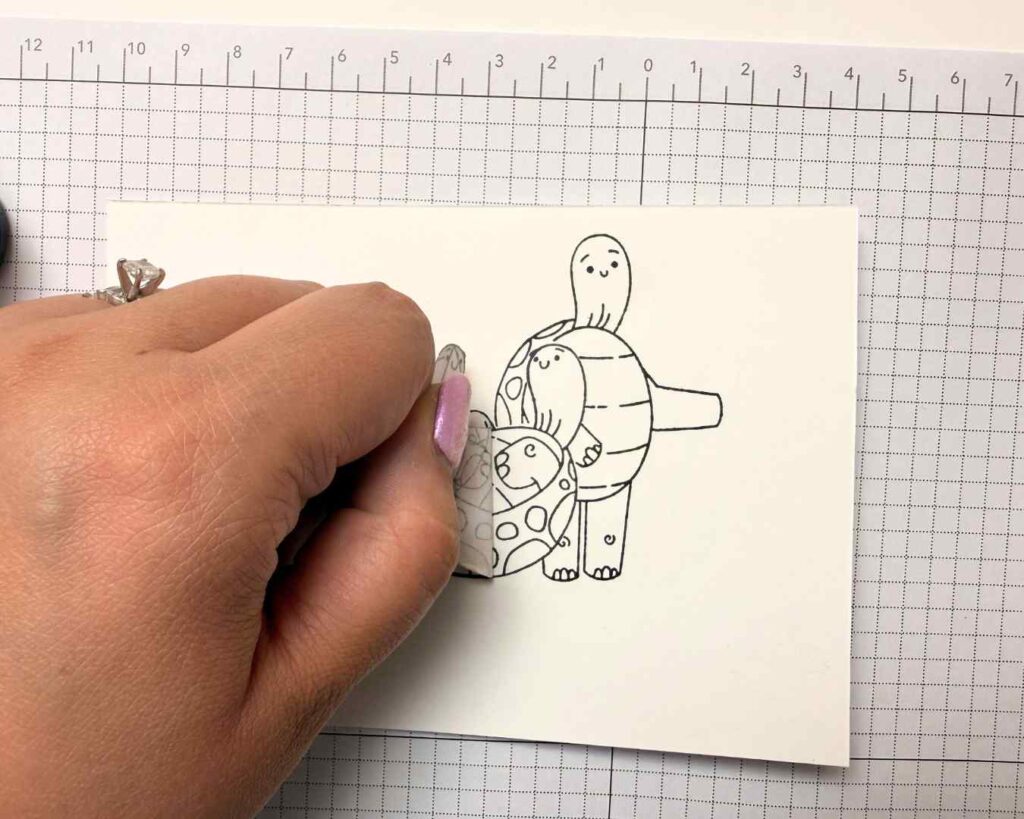
3. Then, place the cut out masking paper image on top of your stamped image on your card stock – this protects your foreground image while you add background stamping or coloring.
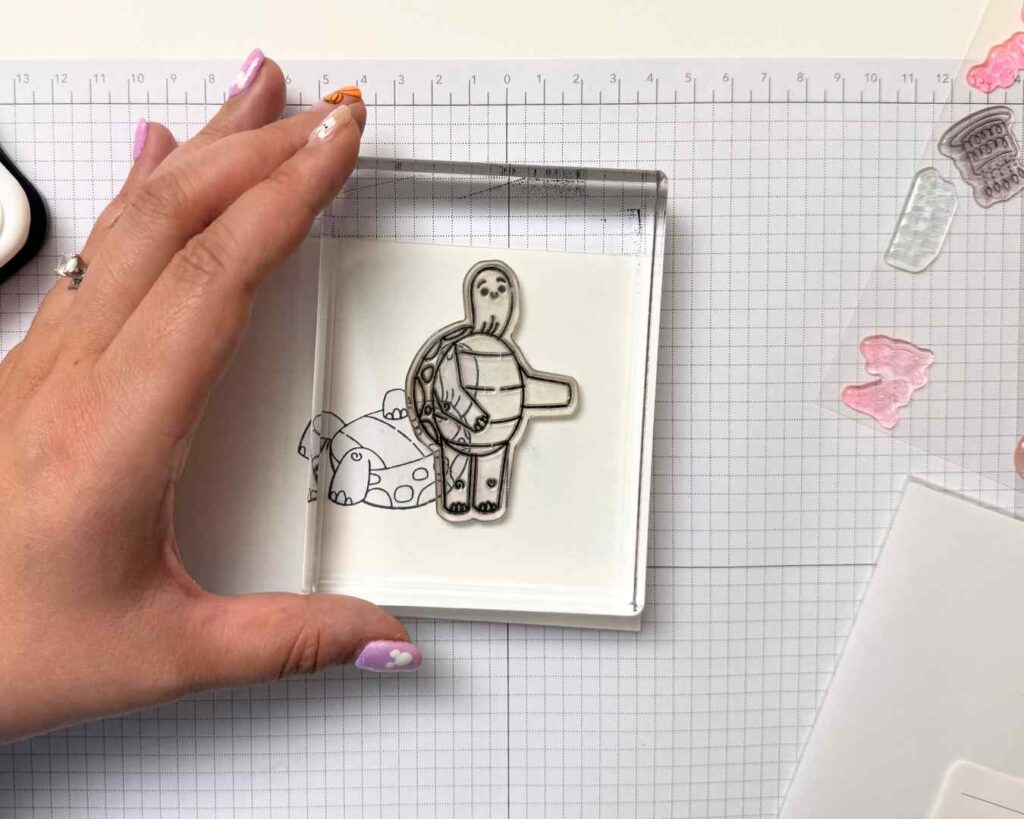
4. Stamp your second image on top of the masked area. The first image stays protected while the new one overlaps perfectly.
5. Repeat as needed for additional layers.
6. Remove the mask and admire the dimension you’ve created!
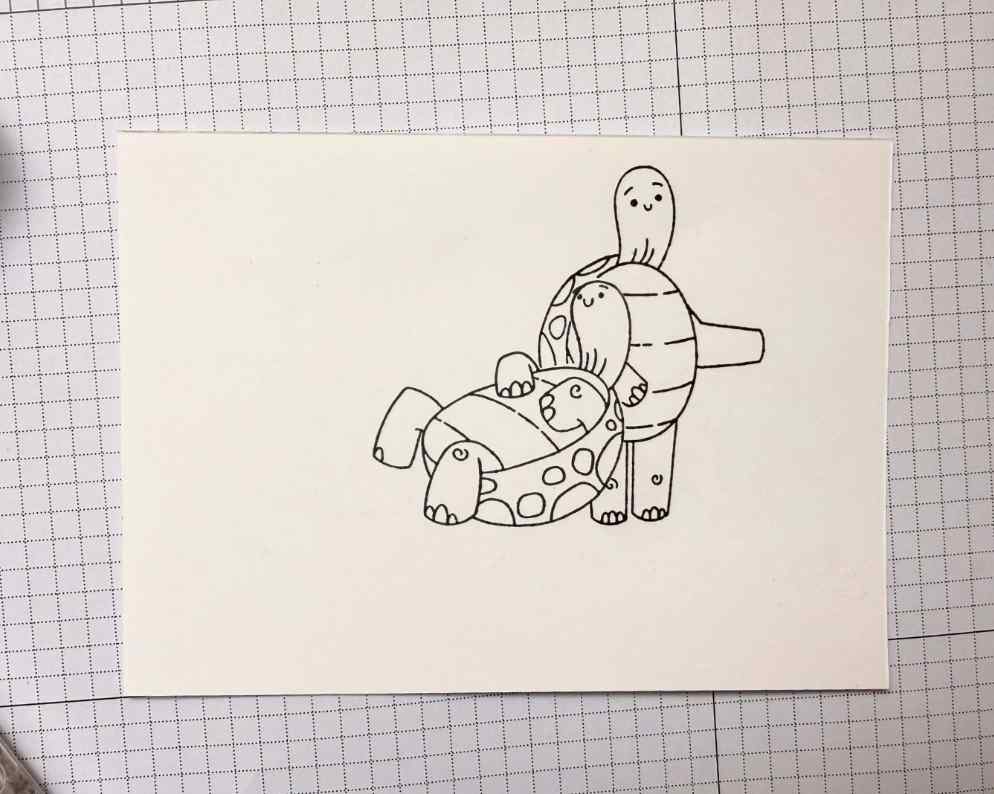
This technique is fantastic for cards with floral arrangements, animal scenes, or any layered focal point. It’s an easy way to achieve that “multi-dimensional” look without fussing with precision cuts or extra cardstock layers.

Color Blocking
Want to create a bold focal point or separate areas for different inks? Color blocking with masking paper is your friend:
1. Cut a piece of masking paper to cover the area you want to protect.


2 Apply ink to the exposed area using blending brushes or sponges.
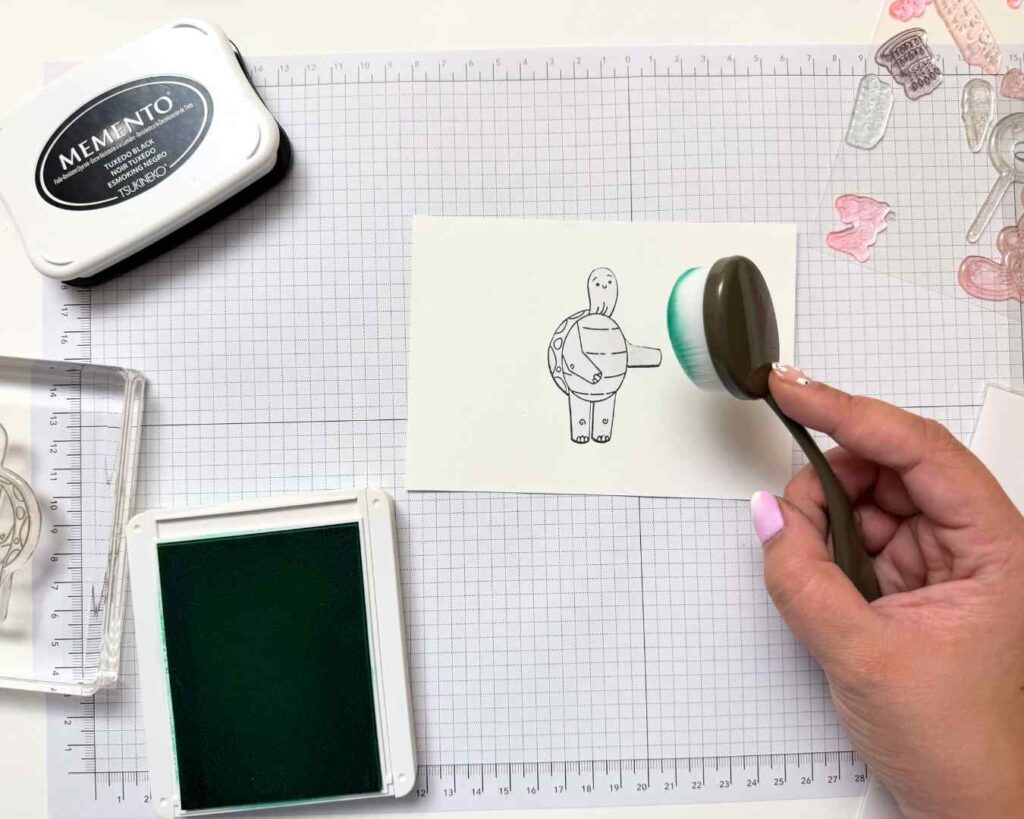
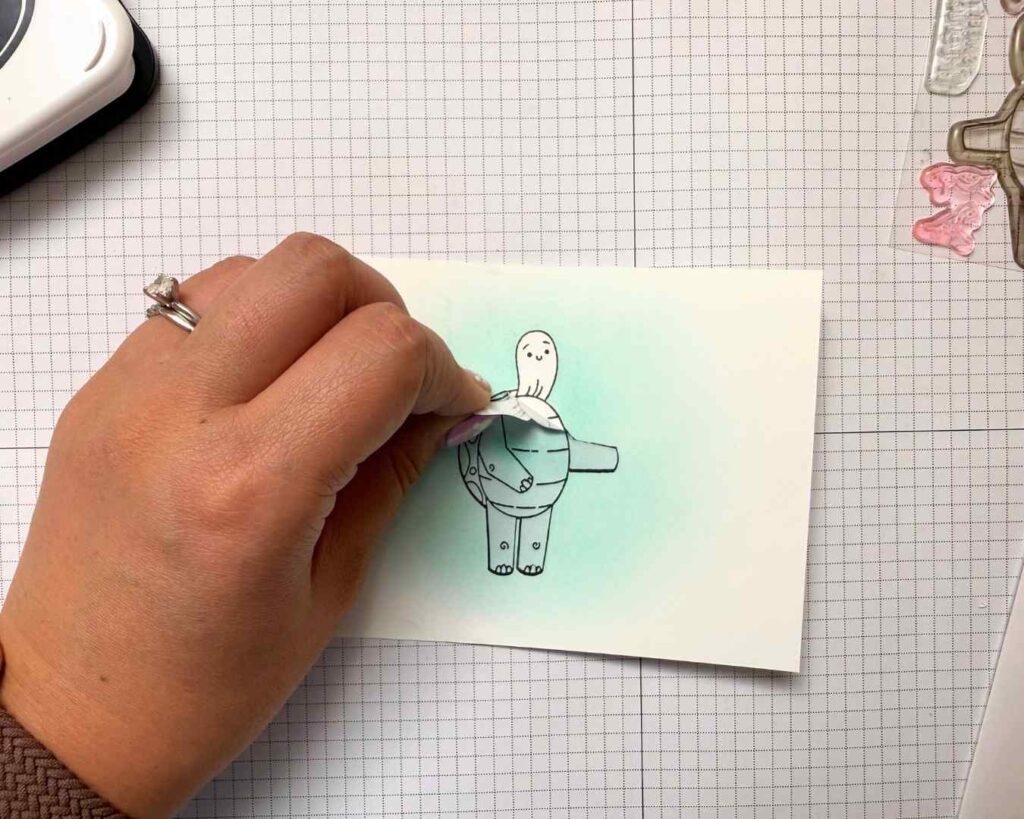
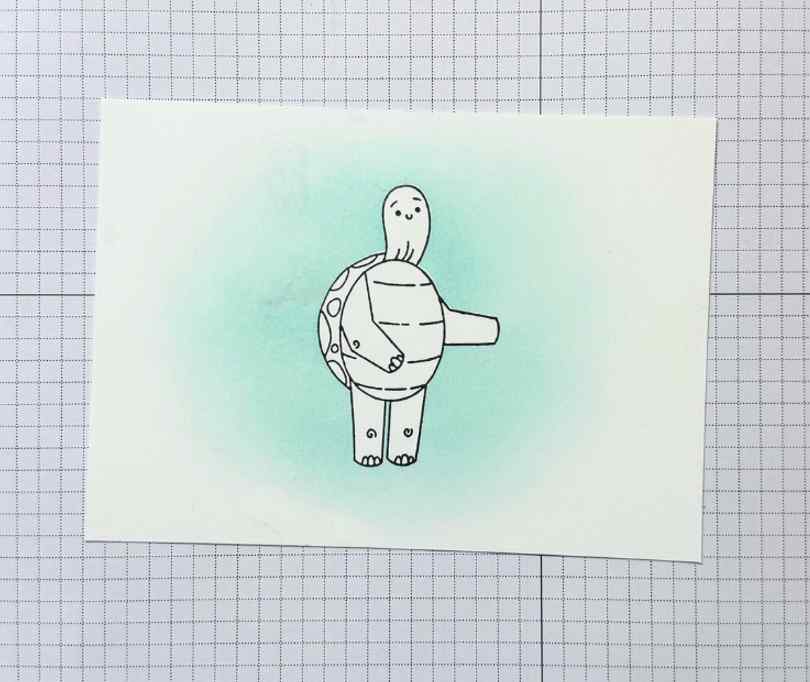
3. Remove the mask to reveal crisp edges and clean, separated sections of color.
Add a stamped sentiment or focal element in the unmasked space for emphasis.
This is perfect for adding gradient ink backgrounds, spotlighting a sentiment, or creating sections for different colors without overlap. It’s one of those card-making tips that feels fancy but is super simple in practice.
Custom Stencils with Masking Paper
Masking paper can even double as a stencil for repeatable shapes or patterns:
- Die cut or punch your masking paper into shapes.
- Lay the stencil over your cardstock.
- Add ink, embossing, or other techniques through the cut-out areas.
- Lift the stencil to reveal your custom design.
READ MORE: Decorative Mask Techniques & Ideas
Ready to Try Masking Paper Techniques?
If you’ve been waiting for a reason to add masking paper to your toolkit, now’s the time! From layered stamping to color blocking to custom stencils, the possibilities are endless, and the results are always impressive.
Don’t forget to grab a few coordinating tools to make your projects even easier: blending brushes, dies, and your favorite Stampin’ Up! inks are a must. And for even more tutorials, tips, and kits, check out the Stampin’ Up! YouTube channel.
Once you know how to use masking paper, your card making and papercrafts open up in ways you never imagined. Layer, blend, block, and stencil—your projects will never look the same! If you want some hands-on help with your masking techniques, reach out to our community of Stampin’ Up! demonstrators today!