Crafting Technique: Masking With Paper

If you’re looking to step up your crafting skills when it comes to color and depth, you will definitely want to add Stampin’ Up! Masking Paper to your repertoire. Keep reading to learn more about this crafting technique and discover some hints on how to mask.
Crafting Technique: Masking With Paper
Masking with paper is a versatile skill that enables you to add precise color to images and build layered scenes. Stampin’ Up! Masking Paper can be cut with scissors, dies, or punches to create a mask (or cover) to protect an area from unwanted marks or color.
Here are the basics of how to mask with paper:
- Cut Stampin’ Up! Masking Paper to desired size and shape
- Cover the area to be protected with masking paper
- Stamp, ink, or color around the masking paper without worrying about the images or colors overlapping
- Remove the masking paper to reveal a crisp, clean design underneath

How to Mask With Paper
Understanding the versatility of and increasing your skills with masking paper is a fun way to add variety and polish to your papercraft creations. But more than that, it’s a great way to explore your creativity. While there are many ways to use Stampin’ Up! Masking Paper: here are three masking tips to get you started.
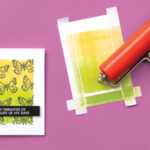
Block & Roll
If you’re looking for some variety in how you create borders on paper crafts, this masking technique is for you! Cut masking paper into strips and apply to the edges to leave the center of the cardstock exposed, and then roll on ink with a brayer. This will give you a good backdrop to showcase your creative work.

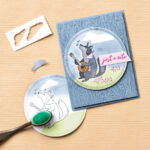
Tape A Shape
Masking paper is also a good way to incorporate basic shapes into your designs. For example, if you are coloring an outdoor scene, you can cut Stampin’ Up! Masking Paper into a cloud shape and apply it to your cardstock. Then, use a Blending Brush to paint the sky blue. When you remove the masking paper, you will be left with the image of a cloud.

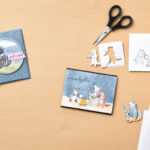
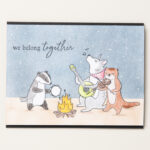
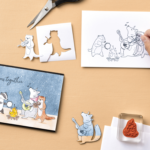
Make A Scene
For a more advanced crafting technique, you can use masking paper to help build realistic scenes.

Start by stamping images on masking paper and cardstock. Fussy cut the stamps from the masking paper and cover the corresponding image. From there, you can use markers, watercolor pencils, or ink to color the background of your design. Once the background is complete, you can remove the masking paper to reveal clean images underneath. Repeat these steps until your image is complete. For a step-by-step tutorial, check out the video below.
Expand Your Masking Techniques with Help!
Now that you have a basic understanding of using paper masking in crafts, it’s time to start bringing your designs to life. Be sure to tag us on Instagram with your unique creations!
Looking for inspiration or some personalized guidance on your next project? Connect with a Stampin’ Up! demonstrator today!