
12 Crafts to Make with Your Stampin’ Up! Advent Calendar

You’re probably reading this because you’ve opened every door of the Stampin’ Up! 12 Days of Creativity Advent Calendar and are wondering what to make with your new crafting goodies. And if you don’t have a craft advent calendar yet, what are you doing?! The Stampin’ Up! advent calendar is only available while supplies last, so get yours now.
Each surprise in the advent calendar is designed to coordinate with the rest. And you’ll get an exclusive stamp set as a bonus item! Here are 12 projects to kickstart your crafting.
1. Floral Note Card
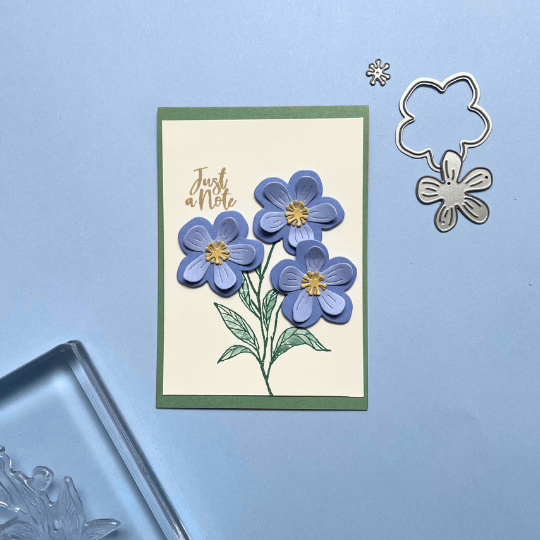
The floral dies from day 1 are the star of this simple cheerful card design. We stamped leaves and a sentiment from the included stamp set, then used a blender pen to smudge the ink into the leaves. Cut out flowers with the floral dies and assemble them with liquid glue. Attach Stampin’ Dimensionals to the bottom of each flower for added depth.
2. Get Well Soon Card
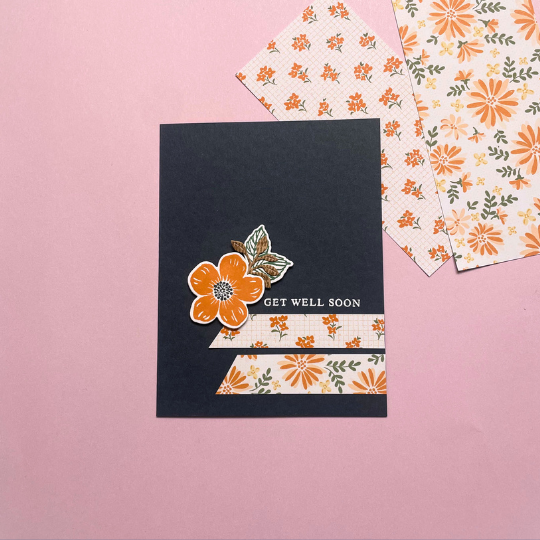
Day 2’s floral Designer Series Paper can be cut into strips and glued to cardstock to create a pop of color against the dark background of this get-well card. We embellished with a stamped and die-cut flower for a bold focal point. The sentiment is stamped using a Versamark Pad then heat embossed with white embossing powder. Learn how to heat emboss.
3. Thank-You Box with a Sparkly Surprise
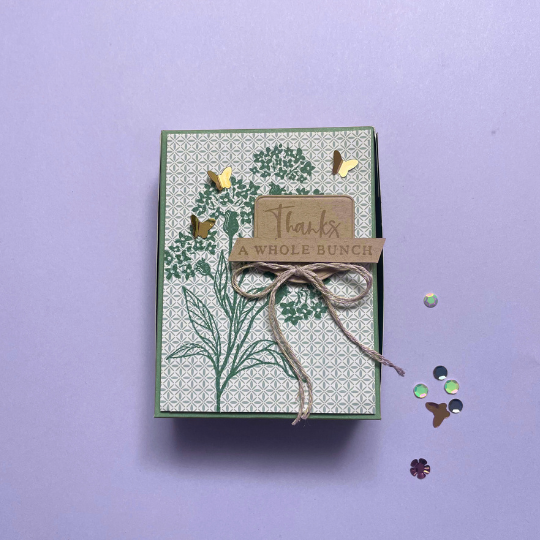
This cute box uses the embellishments from day 3’s advent calendar door. Some sequins are glued to the top of the box, while the rest are loose inside for a confetti-like surprise! You can create a box out of your choice of cardstock or use a pre-made box. We added Designer Series Paper stamped with flowers to create a fun foundation for the stamped sentiment and bow.
4. Gift Bag and Tag
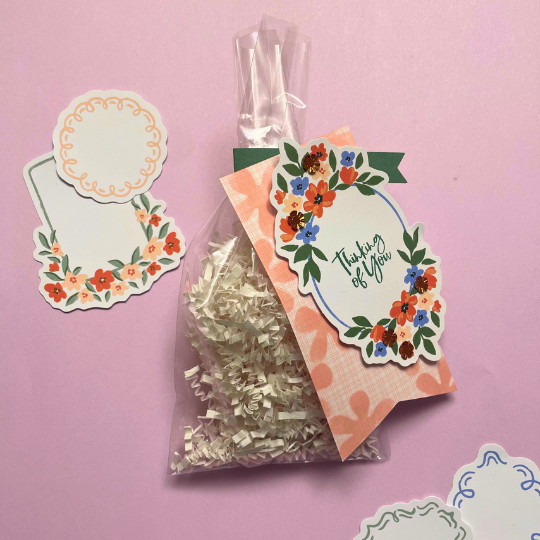
Day 4’s frames ephemera pack gives you a fun way to highlight sentiments, like on this “thinking of you” gift tag. We also added some embellishments from day 3 for extra sparkle. To add flowers to the patterned paper, die cut a single flower out of a piece of cardstock. Place the makeshift stencil in different spots on the paper and go over the opening with an inked sponge dauber. You can attach the tag to your gift bag with Stampin’ Dimensionals.
5. Watercolor-accented Card
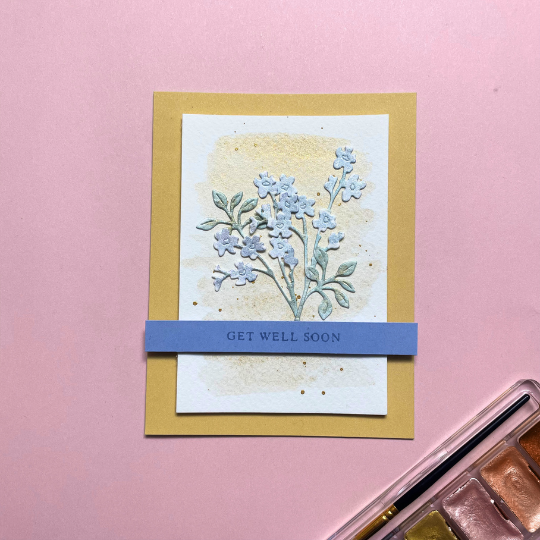
The slightly sparkly paint in this watercolor kit lets you paint a little color into your paper crafting. Mix the watercolor paints together to create custom shades, then use the included paintbrush to add color to die-cut pieces and backgrounds made from watercolor paper. Once the painted pieces are dry, assemble the card and add a sentiment.
6. Card Backgrounds with Colorable Pages
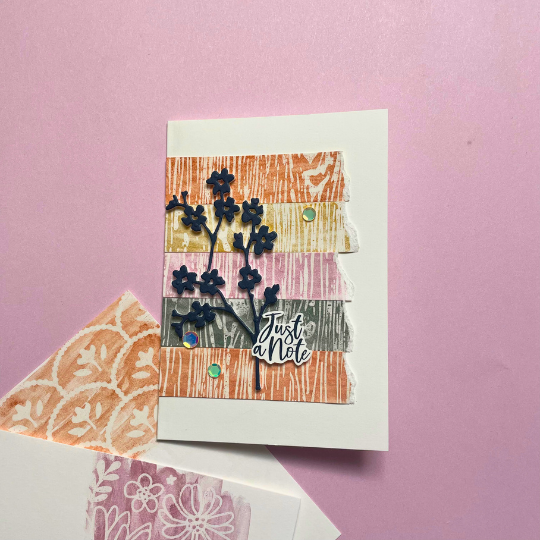
Reveal hidden patterns as you paint over day 6’s colorable pages with your watercolor kit. Cut the colored pages into your desired shapes and arrange them on a white note card to make a fun background like the one in this card. For added dimension, we die cut a floral design out of a foam adhesive sheet.
7. Mini Photo Book

Cut and fold page protectors to create a miniature photo book, complete with a cover! Use the dies from day 7’s slot with the coordinating stamps from the advent calendar stamp set to create a floral scene on the front cover. Slip treasured photos inside or gift this cute book to a friend.
8. Thank-You Card with Stickers
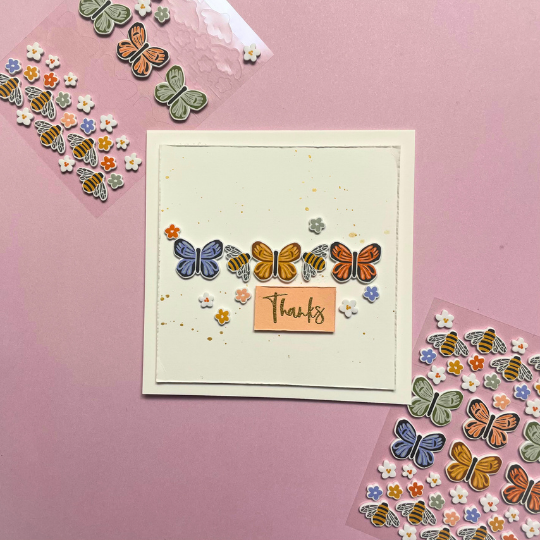
The puffy stickers from day 8 bring a pop of fun to this simple thank-you card. The sentiment was stamped using a Versamark Pad, then heat embossed in gold. We also splattered some gold paint from the watercolor kit across the card background for some visual interest.
9. Layered Miss You Card

The cards and envelopes included in day 9 of the advent calendar provide the perfect foundation for layered designs like this one. Add contrast to the card by gluing squares of cardstock onto the lattice pattern. This layering technique creates dimension while keeping the project mail-friendly.
10. Birthday Gift Packaging
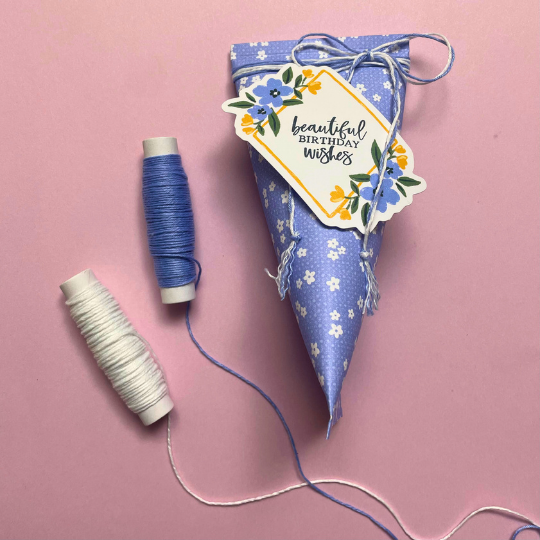
Tie a bow with day 10’s blue and white twine. This project uses Tear & Tape and the Designer Series Paper from day 2 to create a gift bag, and the blue and white twine gives it a cute decorative finish. This project is an easy way to give your gift a little handmade touch.
11. Scrapbook Page with Pockets
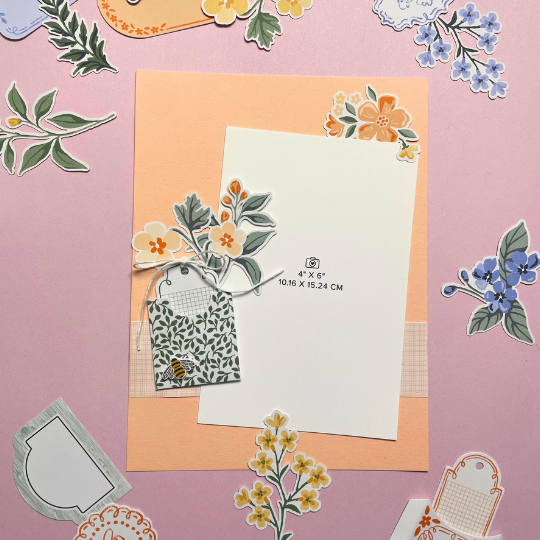
If you’re looking for a simple scrapbooking method, using precut ephemera pieces is a great option. Day 11’s pieces are especially fun, because they include pockets for other ephemera (or photos) to slide in and out of view.
12. Sparkly Birthday Card

The embellishments from day 12 make for an eye-catching finishing touch for a birthday card. Build a focal point using precut ephemera, stamping, and Designer Series Paper, then adhere everything to a cardstock base. Glue embellishments around the design to add some sparkle and visual balance. This card is a beautiful example of how all the advent calendar products can work together to create a breathtaking finished product.
Make the Most of Your Stampin’ Up! Advent Calendar
Every product included in the Stampin’ Up! advent calendar was designed to coordinate with the others. Whether you take inspiration from the projects shown here or come up with your own ideas, the possibilities extend far beyond the 12 days you open your calendar, since the products are intended for all occasions.
If you haven’t picked up your 12 Days of Creativity Advent Calendar yet, there’s still time to join the fun. This crafting advent calendar includes exclusive products that can’t be purchased any other way. Supplies are limited, so grab your calendar while it’s still available!
