Haunted Home Kit: Build a Frightfully Fun Halloween Craft
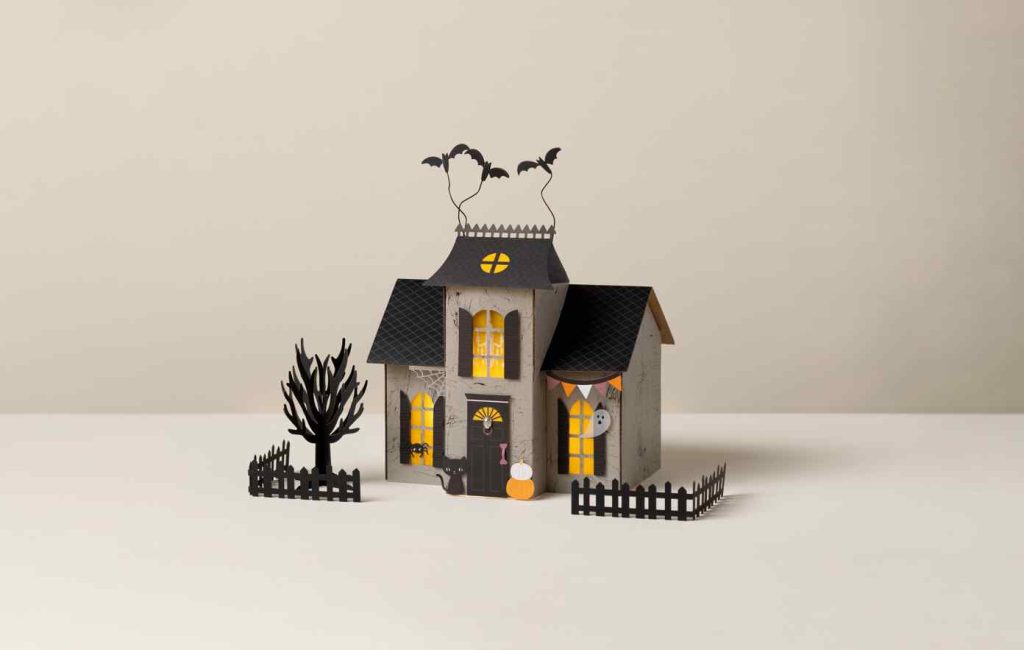
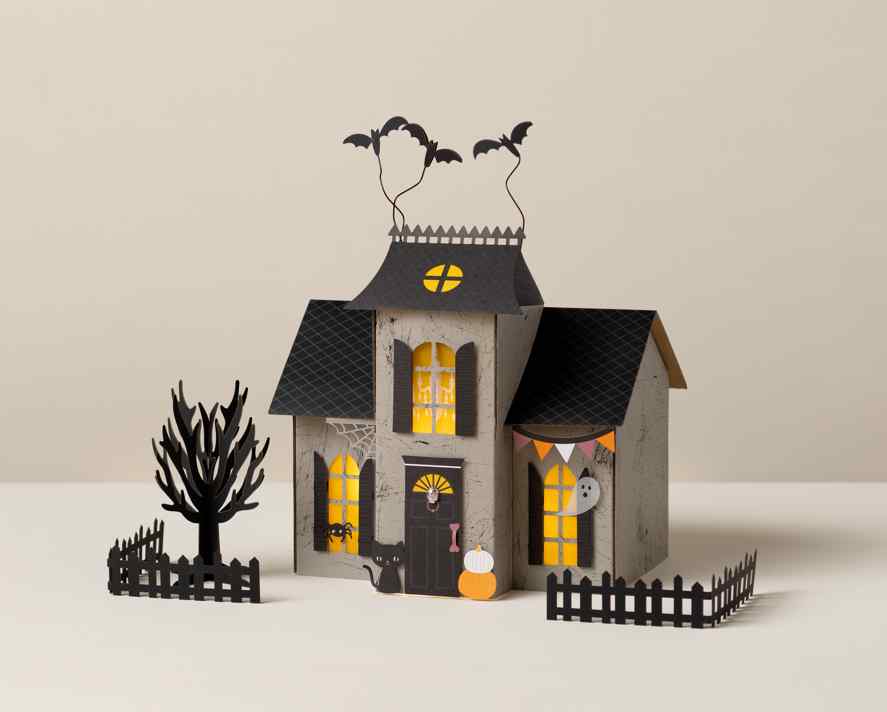
Whether you’re the kind of person who loves a haunted house or shudders at the thought, you’re going to love this Haunted Home Kit by Stampin’ Up! This easy DIY craft kit is the perfect way to jumpstart your Halloween crafting, giving you everything you need to build your own dimensional paper haunted house, complete with high-flying bats and barely-there ghosties.
The best part? You don’t have to be a pro to create this beautifully designed, quality craft, because it comes with everything you need. You’ll get sturdy cardboard pieces to build the home, precut vellum for the windows, all the precut paper elements, and step-by-step instructions to complete your haunted house craft with ease.
And when you’re finished, you’ll hardly believe it was a DIY Halloween project. With a band of bats and spiderweb accenting layered rooflines, “glowing” windows, and perfectly imperfect picket fencing, this coordinated kit will set the stage for all things spooky and fun this Halloween.
Ready to get started? Just grab a glue gun and your Haunted Home Kit!
Build and Personalize Your Own Haunted House Craft
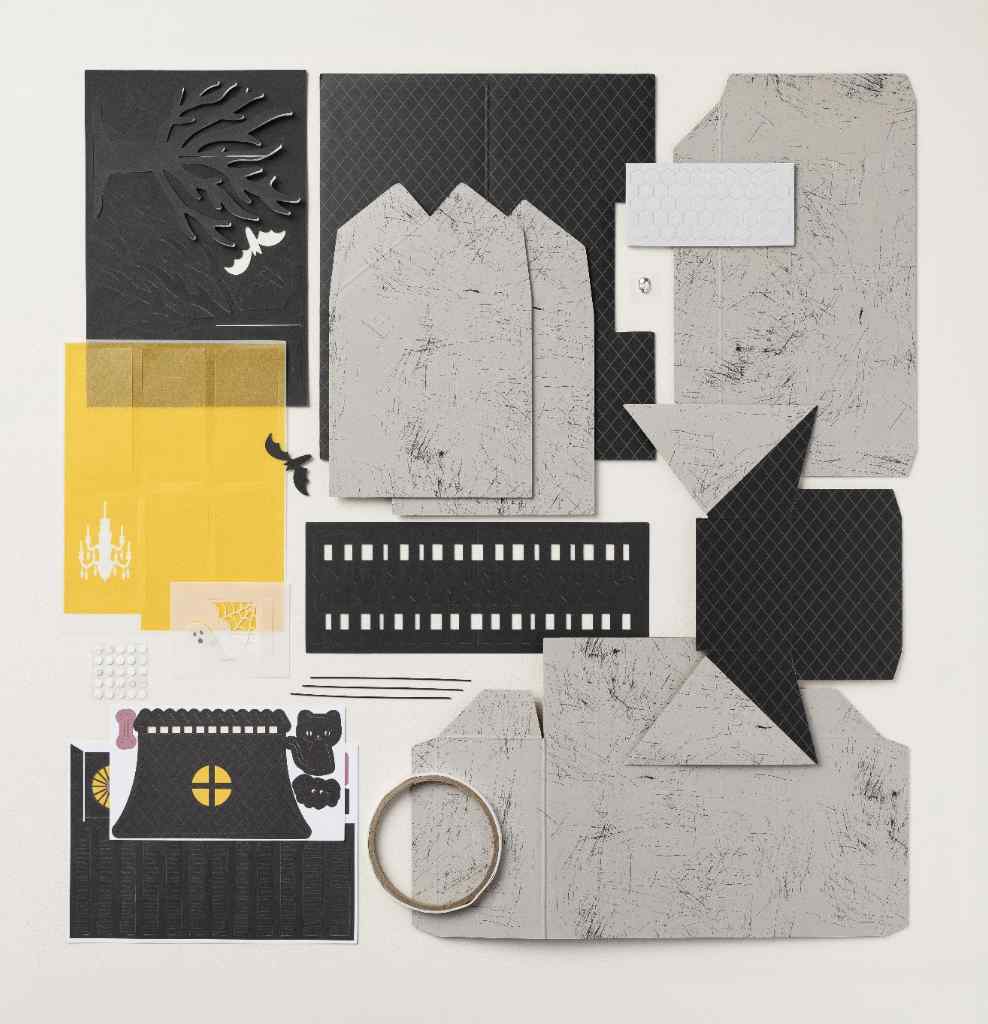
The first thing you’ll want to do when starting this crafting kit for Halloween is lay out your supplies. It’s best to group things in the order you’ll put them together, so start with the cardboard walls and vellum windows. Pop out the precut vellum pieces and lay each piece face down on the table. Apply your tear tape and attach the vellum windows to the cardboard. Place the shiny side of the vellum facing out if you want to give your haunted house a bit of spooky sparkle. Now, bend the cardboard along the fold lines.
Then, use your hot glue gun to assemble the base of your 3D Halloween house. When you’re ready to put on the second story roof, pinch the front of your house from the bottom to help the roof align properly. (For more helpful hints like these, check out this video!)
With the house and roof put together, you’re ready to set your glue gun aside and start using the wire, glue dots, and dimensional adhesives that came with the craft kit to attach shutters, animals, and other decorations to your house. This is the part of the crafting process where you get to add fun, personal touches. Hide your ghost in a surprising spot or let the spider drop from the roof with a string! Hang the banner over the front door and add a mysterious message. You can even add your own house number near the bone door handle. And don’t forget the back side of your 3D house—it’s a great spot to bring in a few more personal tricks and treats. After all, it is your Haunted Home Kit!
See a full step-by-step guide here!

If you do want to add your own special touches to your DIY haunted house, you can easily coordinate using the matching color palette from Stampin’ Up! Bring in bits of Basic Black, Crushed Curry, Gray Granite, and Pumpkin Pie for a playful take on traditional Halloween colors.
Because all the planning, designing, and cutting has been done for you with the Haunted Home Kit, you can easily layer each dimensional detail and assemble the entire thing in about an hour—or more if you’re enjoying crafting together (highly recommended!) or fully customizing the finished product. Either way, it’s a simple project, perfect for all crafting capabilities, with incredible results that totally add to the eerie (but cute!) ambiance of the season.
Creative Ways to Enjoy Your Haunted Home Kit
While creating just for creation’s sake is a fantastic practice for many reasons, it’s fun to enjoy the finished product, too! Once you’ve completed your haunted house papercraft, may we suggest a few display options to make sure it gets all the attention it deserves?
- The Mantel. A classic for a reason. It’s usually very visible, in a high-traffic area, and doesn’t have to compete for attention.
- An Entry Table. First point of contact? Yes, please. Who doesn’t want to see this or any of your other Halloween crafts every time they come or go?
- The Bookshelf. Proudly between Frankenstein and Dracula, perhaps?
- Kitchen Island. Another space with plenty of foot traffic, this spot can feel unexpectedly spooky and fun.
No matter where you choose to display your DIY Halloween house, it doesn’t have to stand alone! Using the coordinating color palette mentioned above, you can always incorporate it into a larger vignette. Consider bringing in pumpkins, moody candles (unlit would be best near your newly completed papercraft!), a handmade holiday banner, and more! You can even light up your haunted house from within using battery-operated tea lights to ensure it remains the focal point.
Another way to enjoy your Haunted Home Kit is to pull inspiration from the design and colors and use it to create coordinating Halloween cards, treat tags and packaging, or scrapbook layouts. This way you’re sure to fully embrace that perfectly spooky aesthetic. sure to fully embrace that perfectly spooky aesthetic.
Bring Your Haunted Home to Life This Halloween
With the boo-tifully coordinated components and easy-to-follow, step-by-step instructions in our Haunted Home Kit, you can turn precut cardboard and paper pieces into a dimensional piece of quality handmade Halloween decor! It’s eerily simple and scary fun—the perfect way to haunt your way into a cozy season of crafting. Whether you’re a new crafter in search of guidance, a busy crafter looking for a convenient seasonal project, or an experienced crafter seeking a change of pace or the chance to customize, this Halloween craft kit is for you.
