Embellishments and Ribbon: Elevate Your Craft Project

Have you ever noticed that using ribbon and other pretty embellishments in your homemade craft ideas is a great way to tie up loose ends? A simple bow or a few dimensional jewels can be the perfect dynamic addition that transforms your project into something that feels complete, unique, and memorable. And with the wide variety of styles and versatility of crafting ribbon and other embellishments, you’ll find no shortage of ways to enhance your favorite scrapbooking, paper craft, and other creative projects!
Using Ribbon and Trim for Crafting
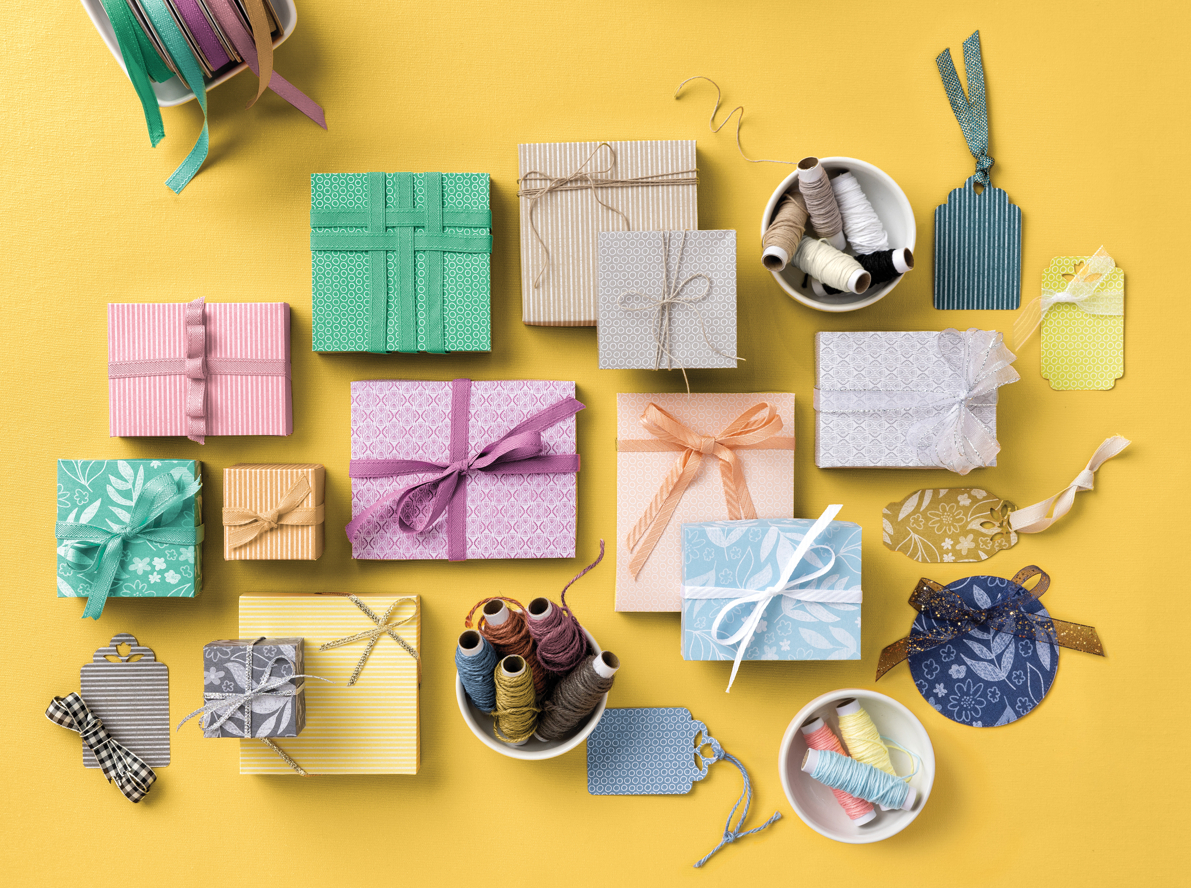
There are so many fun types of ribbon and trim for crafting you can choose from! Depending on the style of the card you’re making or the functional purpose your ribbon will serve in your project you could use anything from a narrow chiffon to a wide and sturdy burlap. Here are a few types of ribbon and string to look for when building your craft and scrapbook accessories collection:
- Lace
- Chiffon
- Velvet
- Baker’s twine
- Burlap
- Grosgrain
- Twill
- Jute
- Linen
Plus, each of these is often available in a variety of designs, including polka dots, stripes, plaid, sparkles, iridescence, and more. Whichever style you choose, using crafting ribbon can make each project truly special. But how do you choose the right ribbon for your scrapbook page, card, gift box, or other creative scheme?
Choosing the Right Ribbon for Your Project
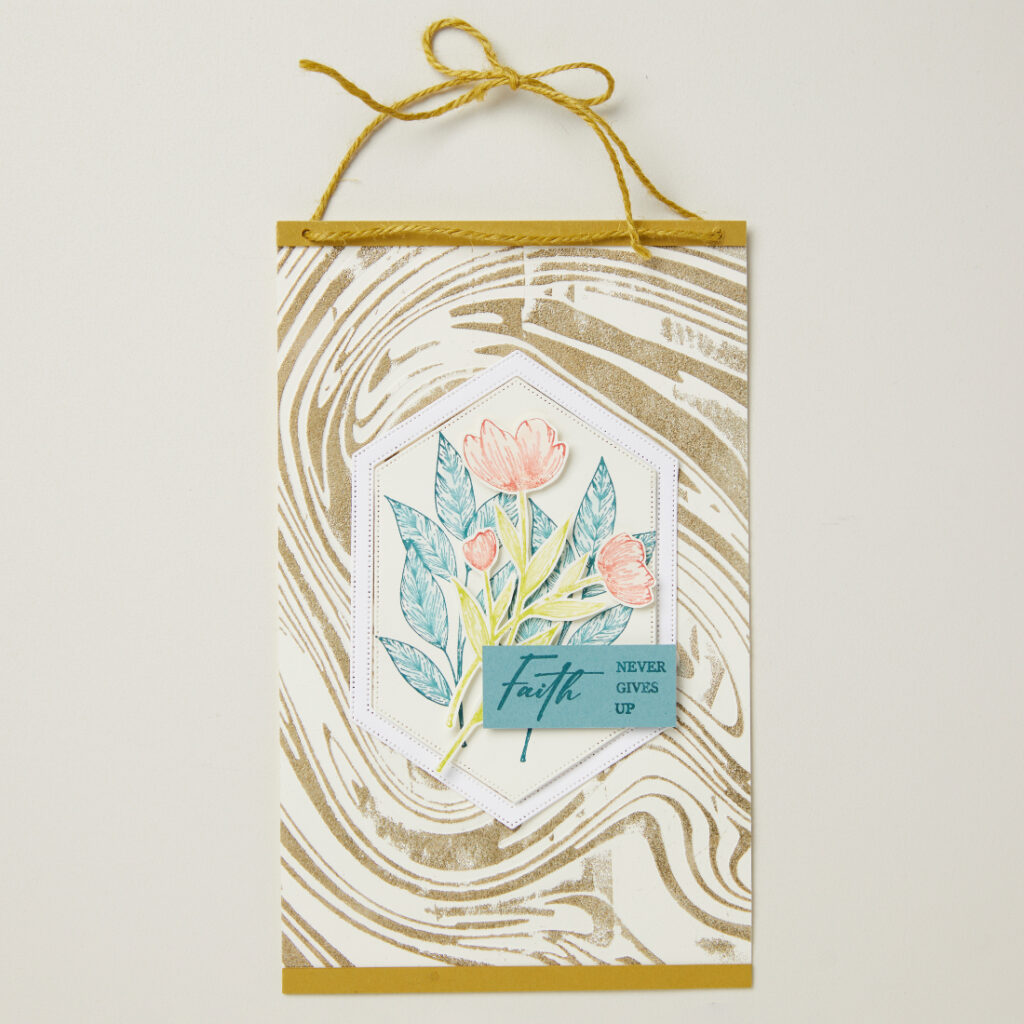
There are a few things to consider when choosing the right ribbon to really elevate your homemade craft ideas. The first thing to think about is the purpose of your ribbon or trim. Often, deciding between decorative appeal and purposeful function can lead you in the right direction; for instance, you may not want to use a thick, woven ribbon if what you want is a delicate bow on the ‘new baby’ card you’re making. Conversely, you’ll want to choose something sturdy if your ribbon is going to be used as a hanger for homemade artwork.
Next, consider things like texture, width, color, and pattern to decide which ribbon will complement the rest of your craft design best. Bright colors work well for designs geared toward kids, whereas you may want something more reserved or elegant for messages of sympathy or an anniversary card. That said, some of the beauty of the creative process lies in getting to choose your own crafting embellishments and tapping into your own unique sense of style.
Creative Ways to Incorporate Ribbon
There are so many innovative ways to utilize crafting ribbon in creative handmade projects. Try implementing some of these techniques into your next homemade craft idea.
Use ribbon to create a frame for a photo in your scrapbook layout.
Create a “pull tab” with a loop of ribbon attached to a photo or die-cut sentiment.
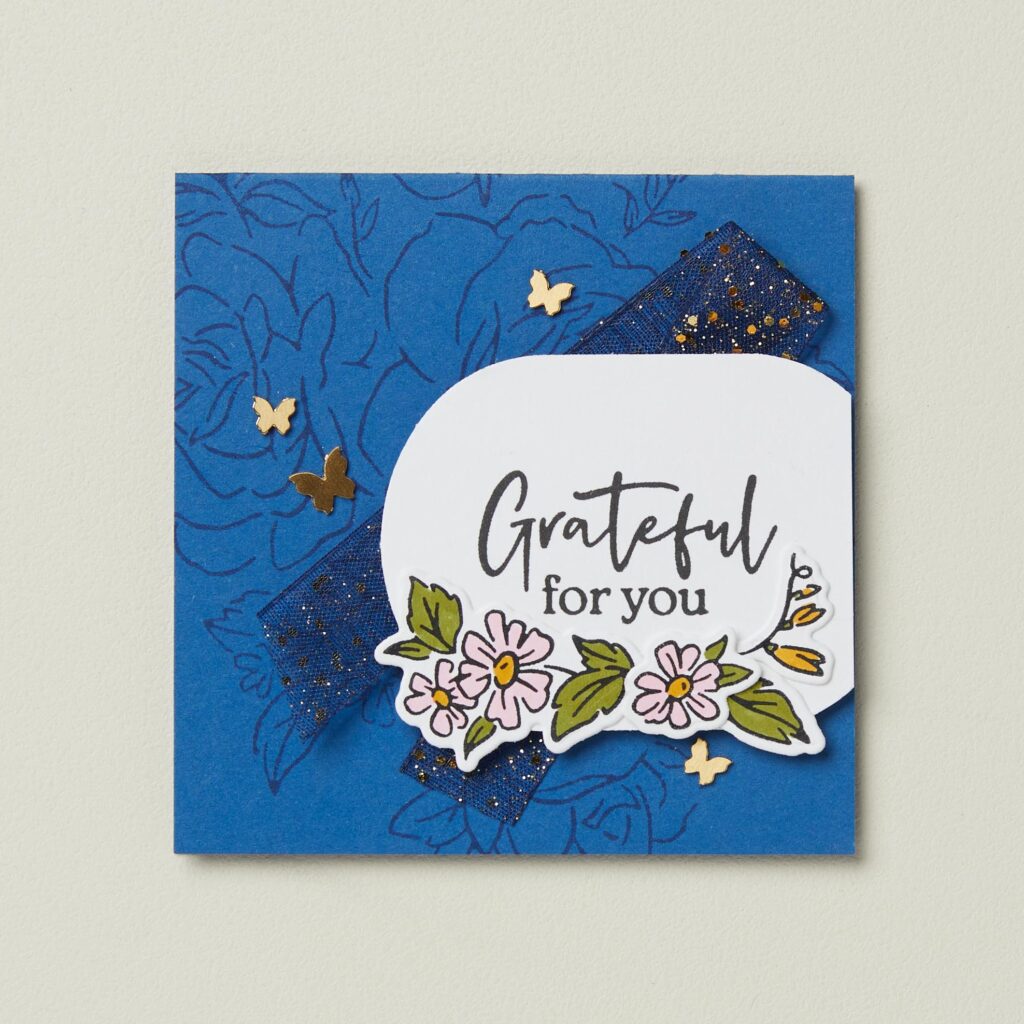
Fold ribbon and secure it to add dimension to a card, layering with Designer Series Paper and a stamped greeting.
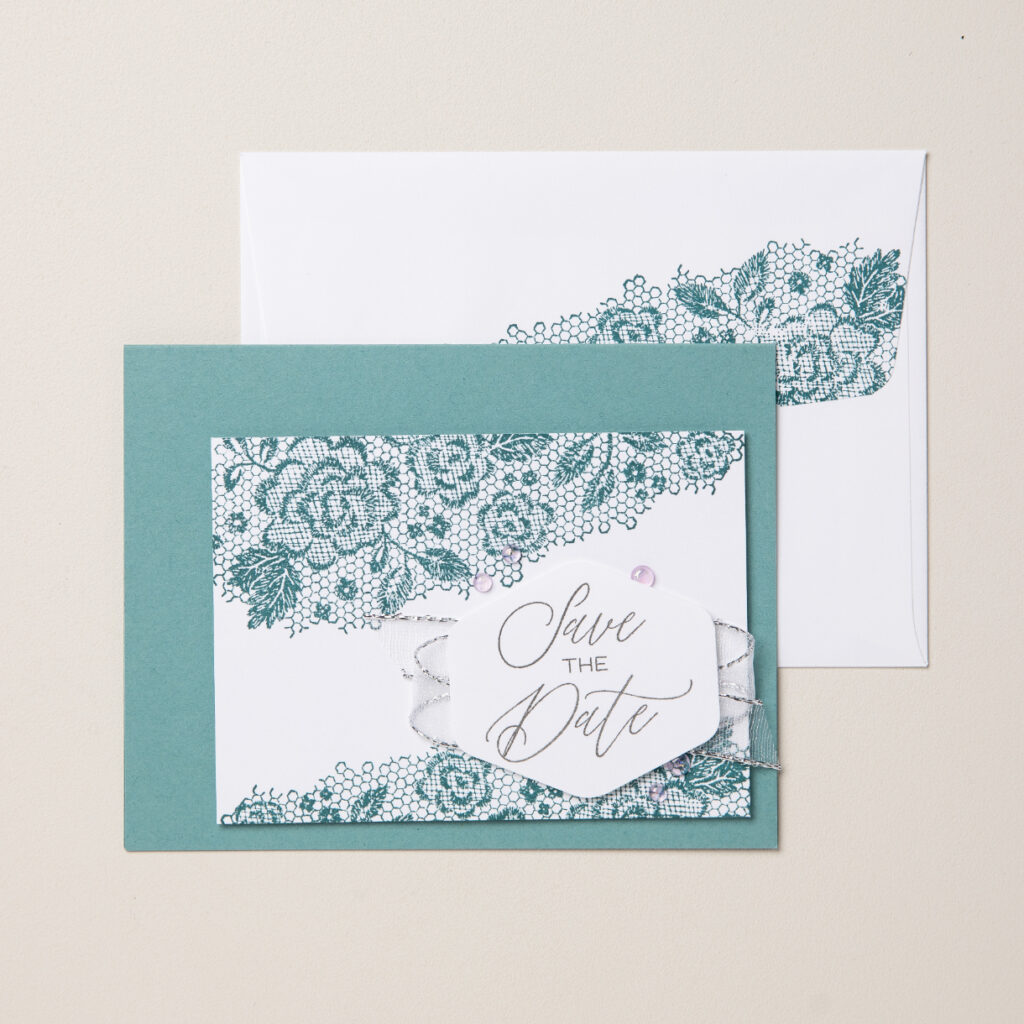
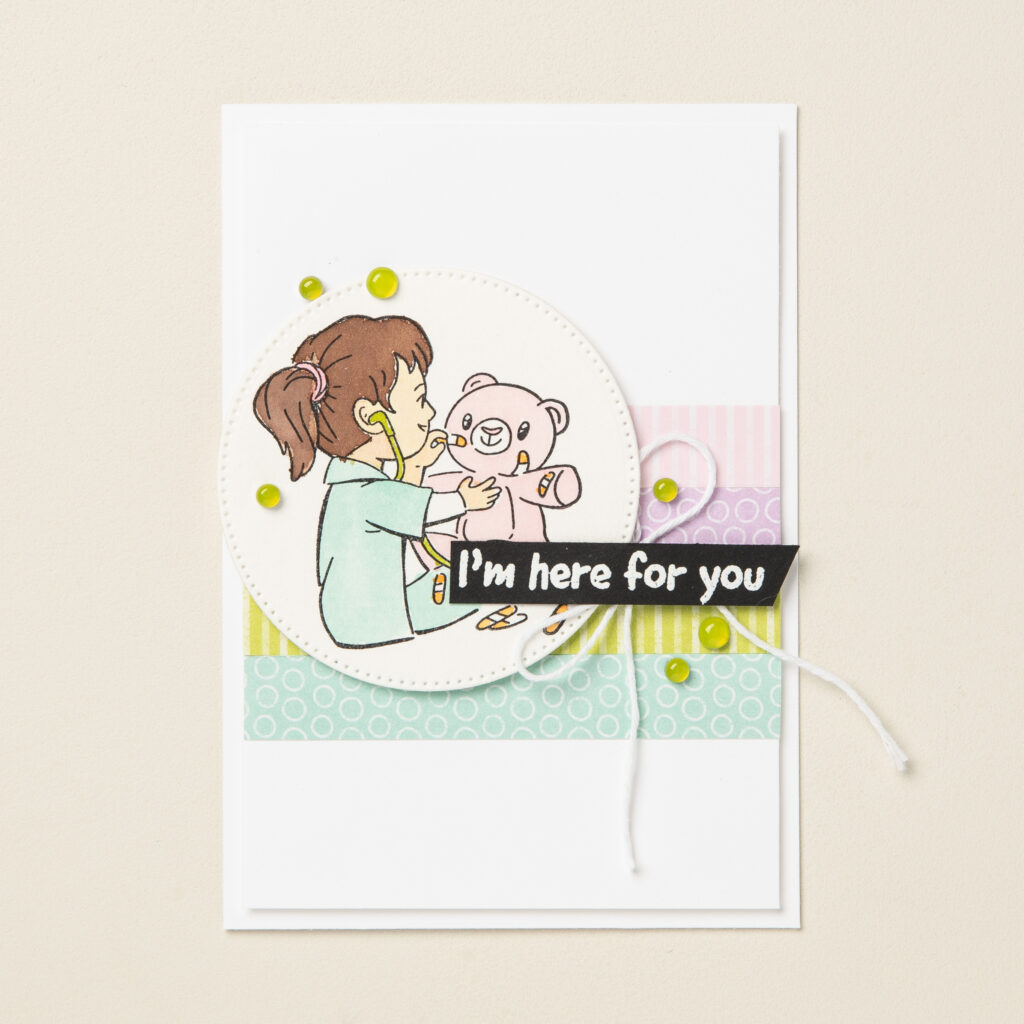
Use ribbon behind a stamped sentiment on a die-cut shape to add visual interest.
Use ribbon or trim to design your own background pattern on the page or on the card base—think stripes or plaid.
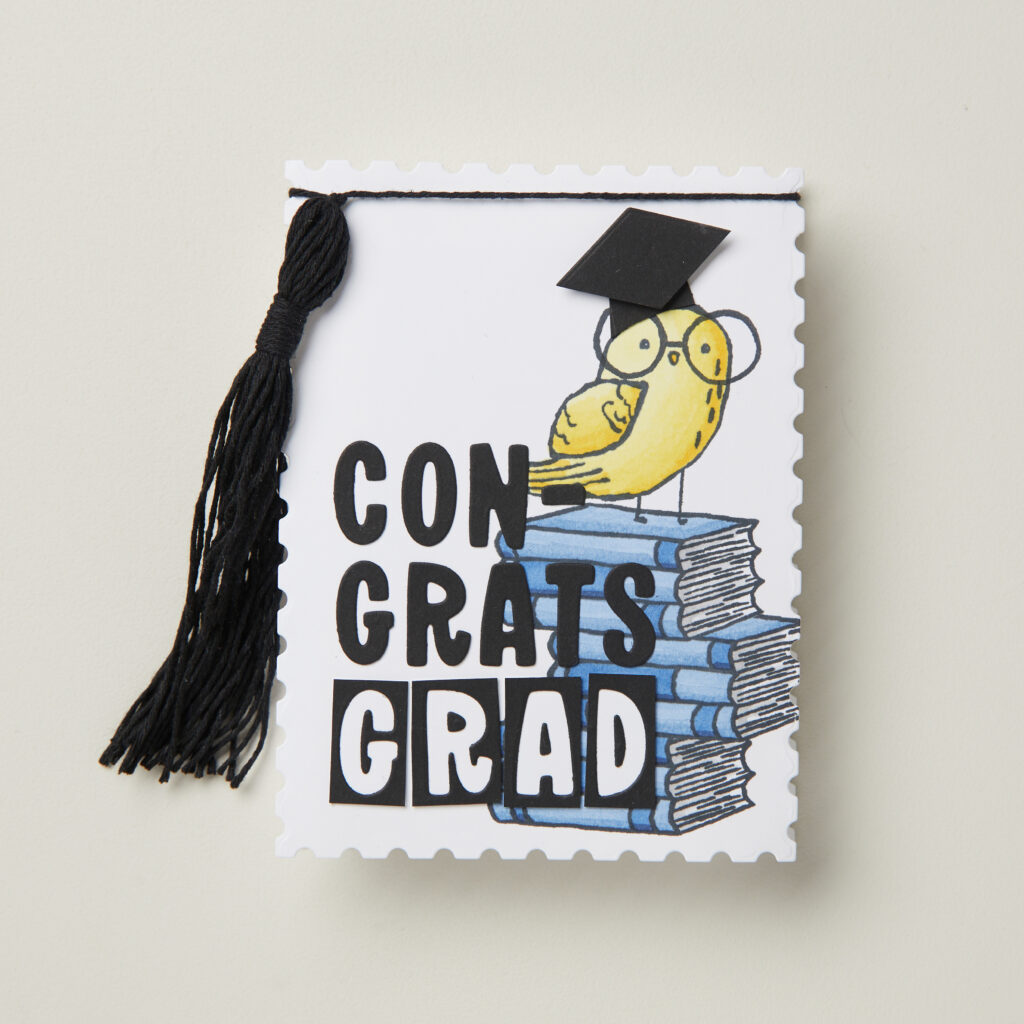
Secure string on either side of a card’s opening and tie it shut for added interactive fun.
Create a tassel with baker’s twine and adorn your project
Mix ribbons and string together to add dynamic visual appeal and texture.
Adding Embellishments to Your Projects
Adding other crafting embellishments is another way to make the most of your homemade craft ideas. These are the finishing touches that make any handmade project feel thoughtful and unique in every way.
Try working with anything from vintage buttons to adhesive-backed brass butterflies to top off any of your favorite creations.
Different Types of Crafting Embellishments
Because crafting is such a personal hobby, we are firm believers that the embellishments you use should reflect your preferences, personality, and experiences. This means that utilizing anything from your own pressed leaves to adhesive-backed gems is free game as you bring your own homemade craft ideas to life!
If you’re searching for unique touches for your cards, scrapbook, gift boxes, and more, we suggest tapping into the old button jar, a pressed flower collection, fabric scraps, and even found items like small shells. (Just keep in mind that these types of materials won’t be archival and could yellow or damage the page and paper over time.)
And if you’re ready to add plenty of extra diversity and fun to your DIY creations, you’ll discover a world of premade crafting embellishments, including:
- Colorful, dimensional dots
- Gems
- Sequins
- Industrial elements
- Brass animals and insects
- Laser cut paper accents
- Wooden layering elements
- Coordinated ephemera
Whatever your personal style, let your imagination guide you as you look for the ‘just-right’ crafting embellishments to complete your handmade project. And don’t be afraid to layer, mix and match, and test the boundaries—after all, that’s how new levels of joy in creation are discovered!
Tips for Attaching Embellishments
Attaching your embellishments securely is a key factor when you know you want your handmade creations and all of their elements to last. Here we’ll talk through our top adhesives, offer some tips on how and when to use them, and propose a couple of bonus attachment techniques.
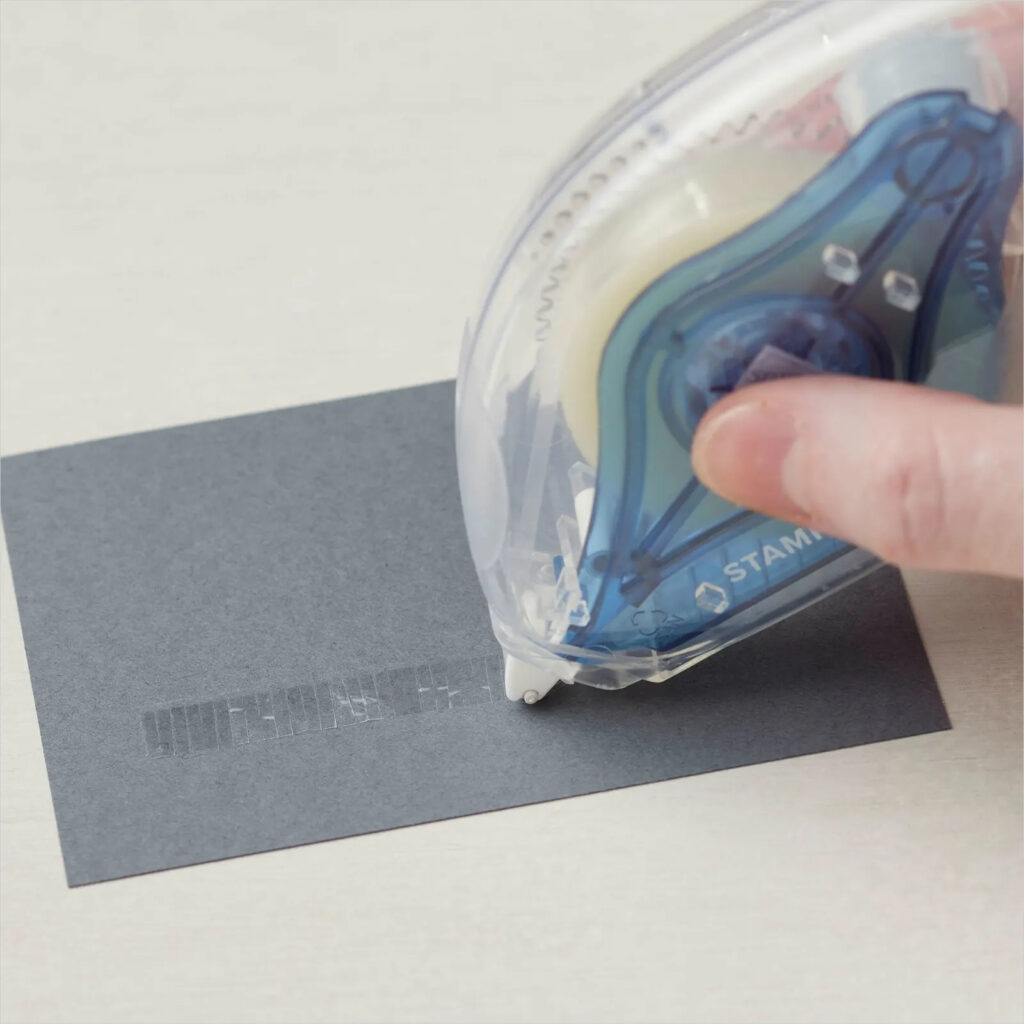
Permanent adhesive runners: Adhesive runners, also called glue or tape runners, are often the most convenient way to adhere two elements in paper crafting and other handmade craft projects, with the additional benefit of zero dry time. That said, this type of adhesive doesn’t provide the depth of attachment you would find in a typical glue or one of our foam adhesives (below), so if your embellishment doesn’t have a smooth surface to which this adhesive can attach, you’ll likely want to go with another option.
Extra-strength permanent adhesive runners: An even stronger and more durable option than the original adhesive runner, this is a great choice for heavier embellishments with a flat surface to which this type of 1-dimensional substance can effectively stick. Think chipboard elements and heavier ribbons!
Foam adhesives: Stampin’ Up! foam adhesives, which come in strips and easy-to-use hexagonal stickers, add dimension while securing your embellishments and ribbon to cardstock. They’re great for use with larger buttons, gems, die cuts, and even ribbon, as you can press the foam into shallow crevices that may exist on the back of your chosen embellishments for a highly effective bond.
Glue pens: Our fine tip glue pen (which has a pin inside the lid to keep the nozzle clear!) makes it incredibly easy to control the placement and amount of glue you’re using to adhere small embellishments, glitter, and detailed die cuts to your craft project. It dries fairly quickly ensuring that clean up is a breeze and there’s no delay in storing or displaying your handmade creation.
Glue Dots®: Glue Dots® are a great way to get some of the benefits of glue without the hassle of dry time or spreading. Think of them as powerful double-sided stickers you can easily place on the back of your embellishments for little to no added dimension but a secure adhesion.
Staples: Another fun way to attach crafting embellishments, especially ribbon, to your handmade craft project is with staples. This technique combines form and function in a simple, semi-rustic way that adds yet another thoughtful dimension to your creation.
One additional thing to note about the type of adhesive that you choose, beyond its durability, convenience, and lack of visual intrusion—you want to make sure that the product is acid-free. This helps ensure that your adhesive will stay in great condition for years without yellowing, drying out and cracking, or otherwise compromising the integrity of your homemade craft ideas.
Inspiration and Handmade Craft Ideas
Ready for some inspiration on how to use ribbon and embellishments in your upcoming craft projects? These are a few of our favorite examples that really take each project from basic to truly special.
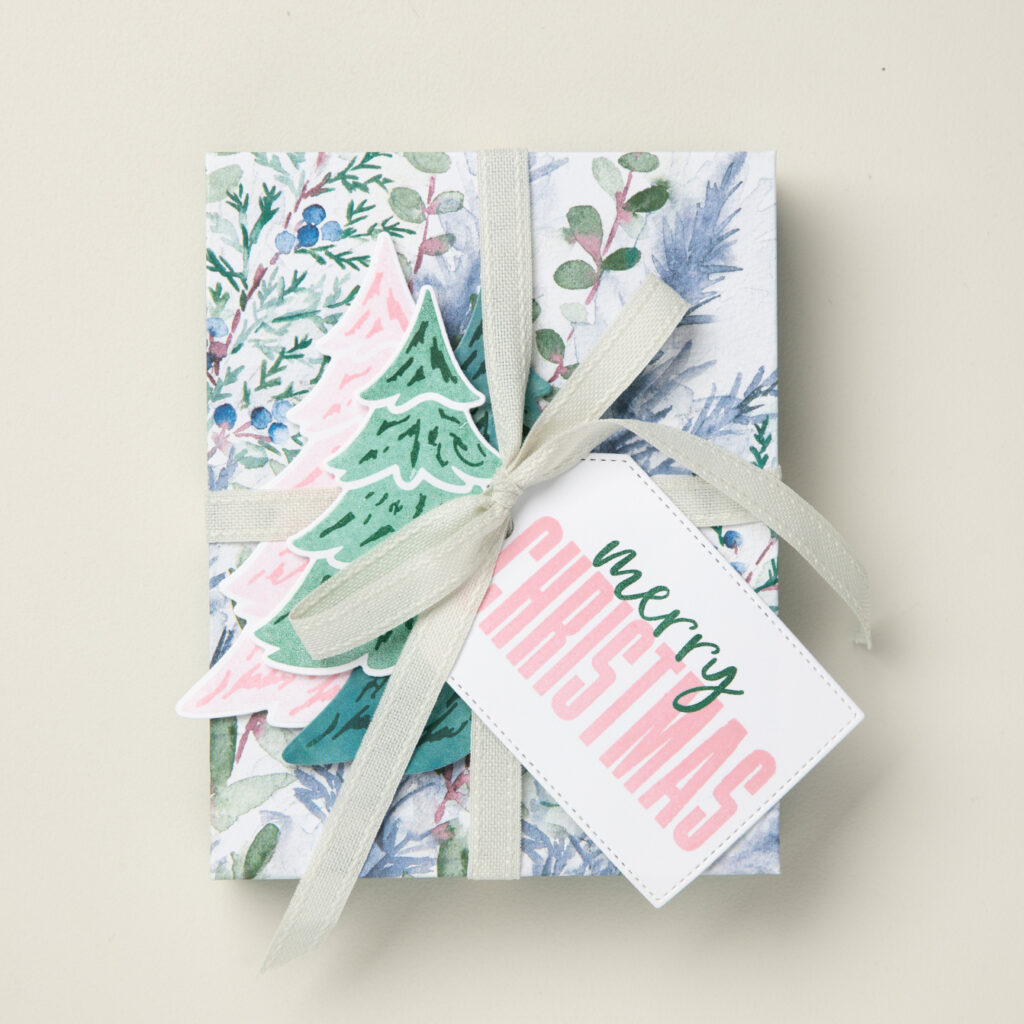
The first—and easiest!—way that we love bringing a homemade craft idea to life is to start with perfectly coordinated ephemera. These already-printed and cut-out paper element sets make it incredibly simple to create themed craft projects, cards, and more. Simply arrange the components you’ve chosen on your favorite paper base and adhere with your adhesive runner or a few foam dimensionals to add some extra depth.

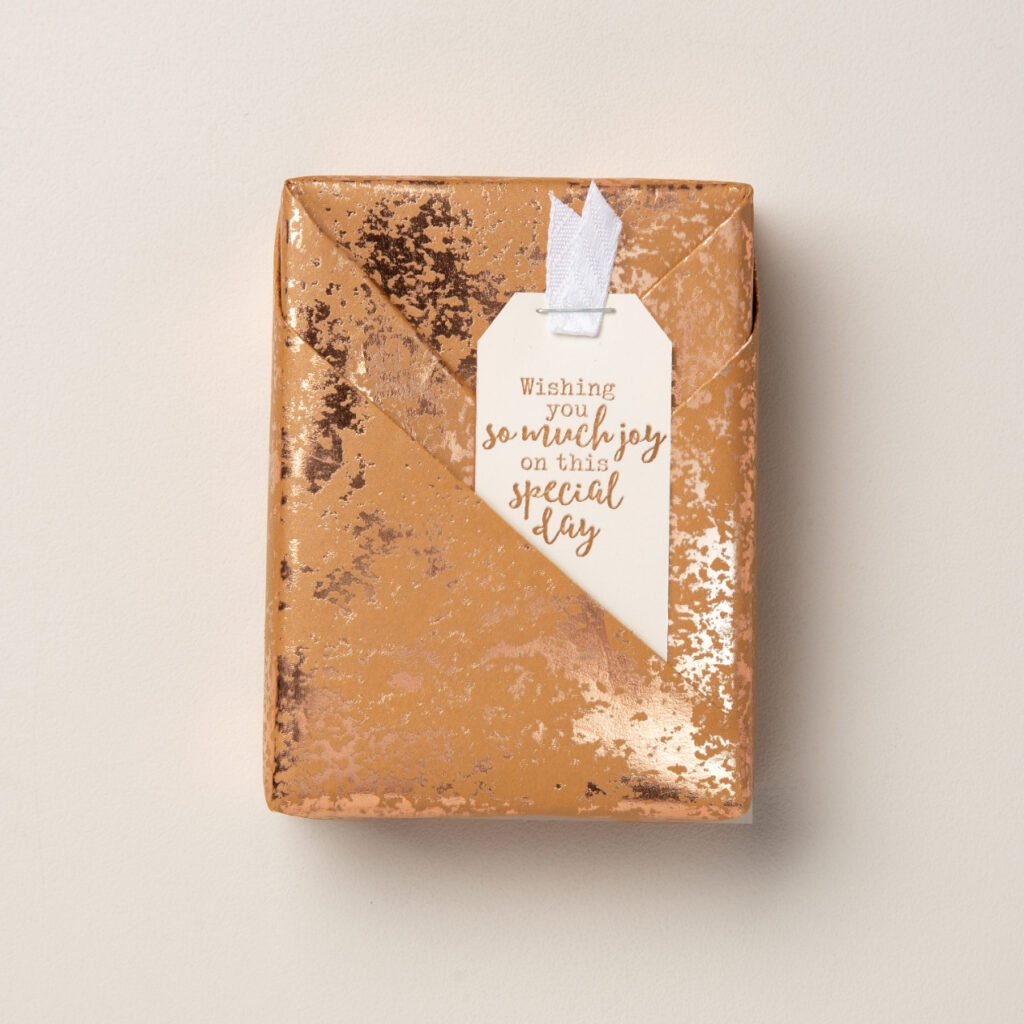
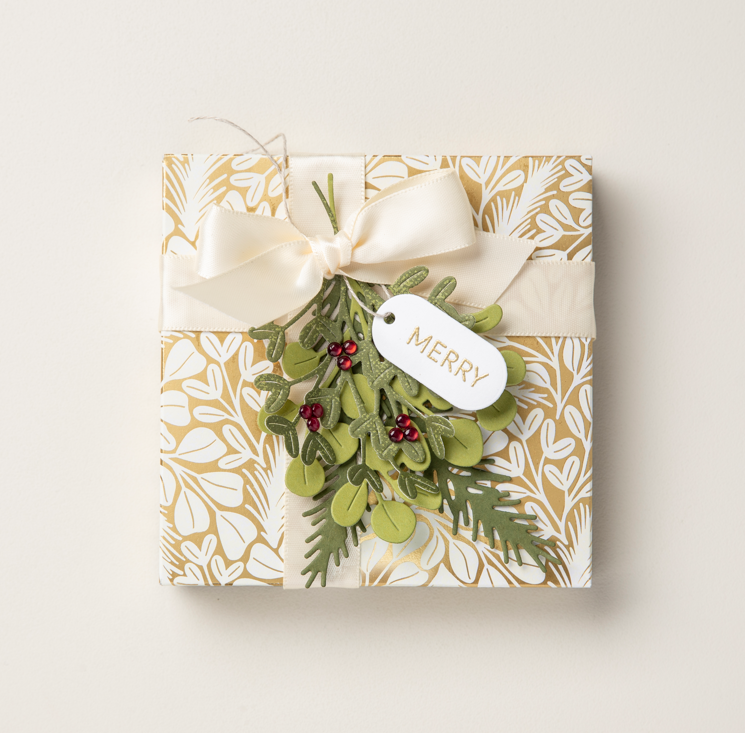
If you’re ready to personalize your handmade designs further, another way we love to embellish is by creating custom gift boxes for special occasions. Using ribbons, twine, and hand-stamped elements, you can layer on the personality and literally tie it up with a bow!
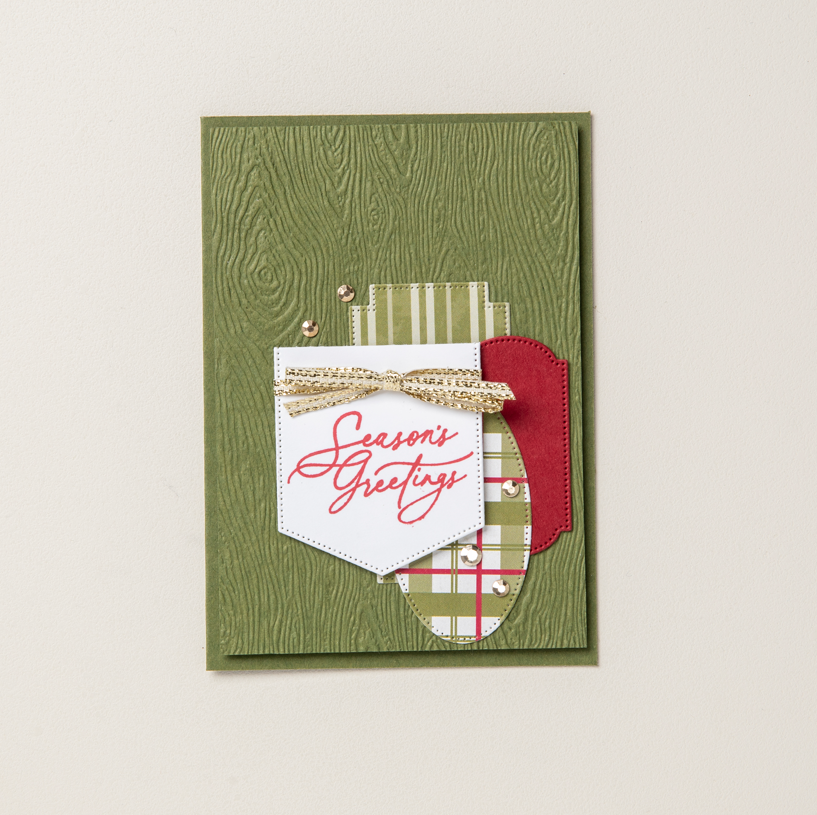
And our favorite way to elevate a homemade craft idea? Combine a little of everything to create a bit of eye-candy magic! Whether on a card, a scrapbook page, a wall hanging, or anything else you choose to make, you can’t go wrong with some pretty ribbon, color-coordinated die cuts, and a few glossy and dimensional dots.
Level Up Your Crafts with Stampin’ Up! Ribbons and Embellishment Materials
Feeling that familiar urge to get creating? Whatever project you’re feeling inspired to make, why not start with quality products from Stampin’ Up!? From beautiful ribbons and embellishments to high-quality adhesives that will ensure your project lasts a lifetime, you’re sure to find all the elements you’ll need to take your homemade craft ideas to the next level!
Need a little more help along the way? Find a Stampin’ Up! demonstrator near you!