Creating Personalized Birthday Cards: A DIY Guide
If you’ve ever found the perfect birthday gift for a loved one, you know just how much better it becomes by adding a homemade birthday card to the package—and sometimes, that DIY birthday card is the gift itself! That extra bit of personalization can truly let someone know they’re valued, seen, and celebrated. Plus, creating a little bit (or a whole bunch!) of birthday joy and beauty for someone else is not only a powerful tool for connection, it’s super fun for you!
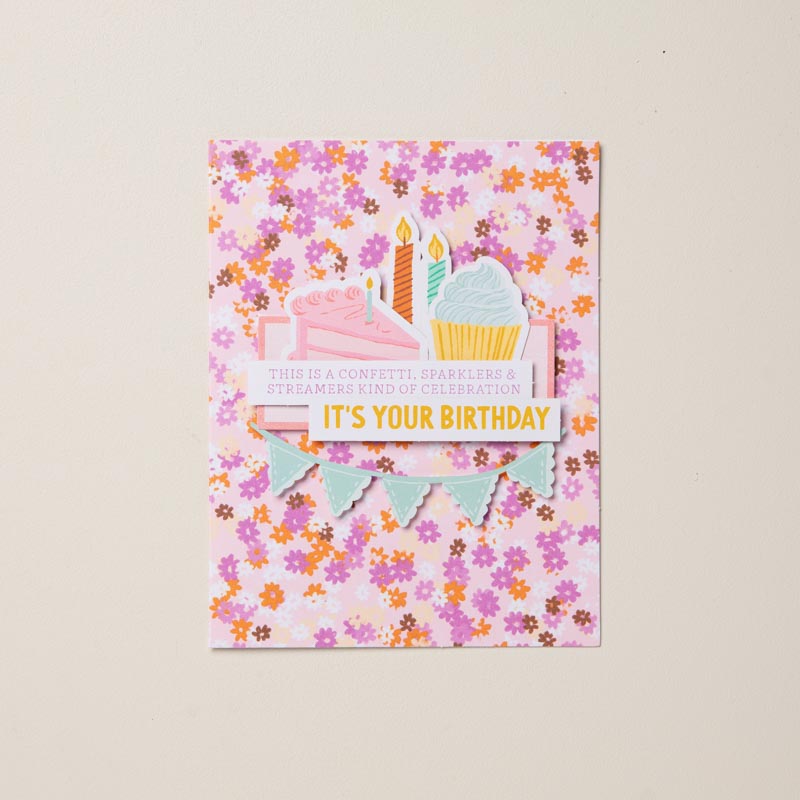
Are you ready to make your own birthday cards for friends and family? Do you already have the experience but are looking for some handmade birthday card inspiration? Look no further as we explore the world of personalized birthday wishes, from basic cardstock to fabulous trends in paper design, stamps, and more!
Getting Started with DIY Birthday Cards
To make your own birthday cards, you’ve got to start from the basics—make sure you’ve got any supplies you may need or want on hand to make the process go smoothly and help the card turn out just as you want it to.
While each new card design will look a little different and might require a specific stamp or color combination, you can ensure you have the standard cardmaking supplies at the ready. For beginner cardmakers, we recommend the following basics for homemade birthday card materials:
- Plain cardstock in a variety of colors, or our basic white notecards and envelopes
- Paper trimmer or scissors
- Crafting adhesive
- Coordinating patterned paper
- Greeting (you can use stamps and ink or handwrite something)
- Embellishments—ribbon, enamel effects, jewels, etc.
Once you’ve gathered the items you have available, you’re ready to move on to the next step of creating your own birthday card—the theme.
Well, the main theme is pretty obvious: celebrating someone’s birthday! But beyond that, the whole idea of crafting a card yourself is to personalize it to the recipient’s personality, style, hobbies, etc. At this stage of the process, it’s a good idea to take a few minutes to think about your loved one and what’s going on in their life so you can tailor their card perfectly to them. For example, are they hitting a big milestone age this year? Have they recently gotten into fishing? Are they a sucker for clever puns? Your DIY birthday card should show that you care and see the person you’re gifting it to, and choosing the right theme for each person is a great way to do just that.
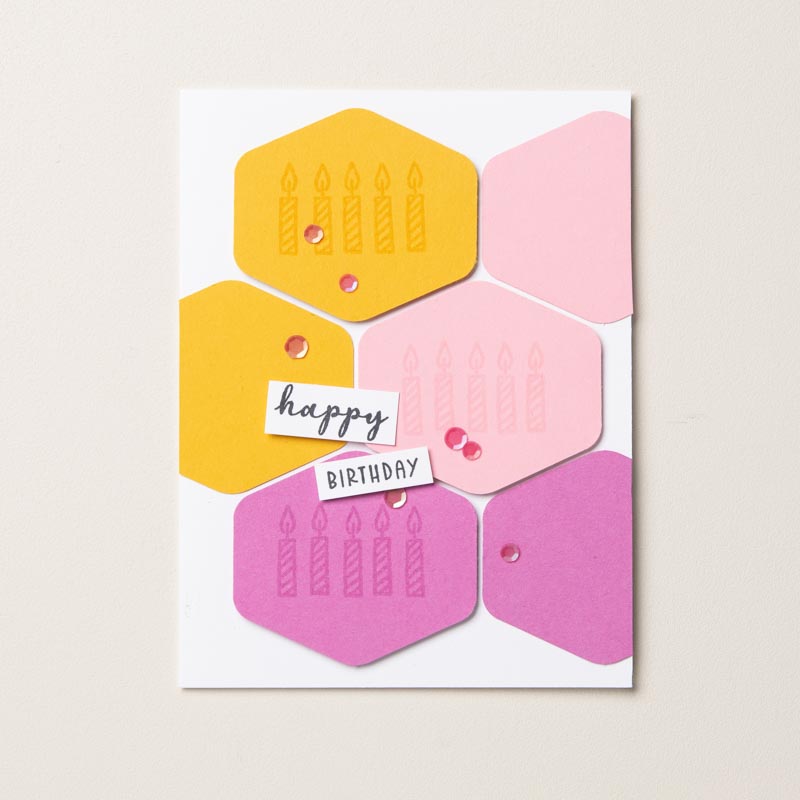
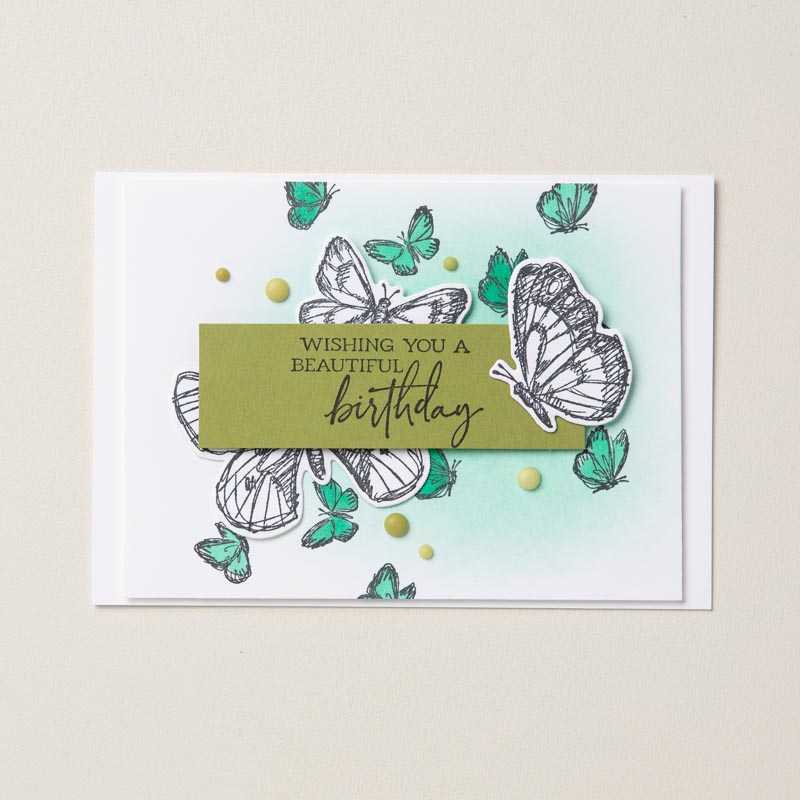
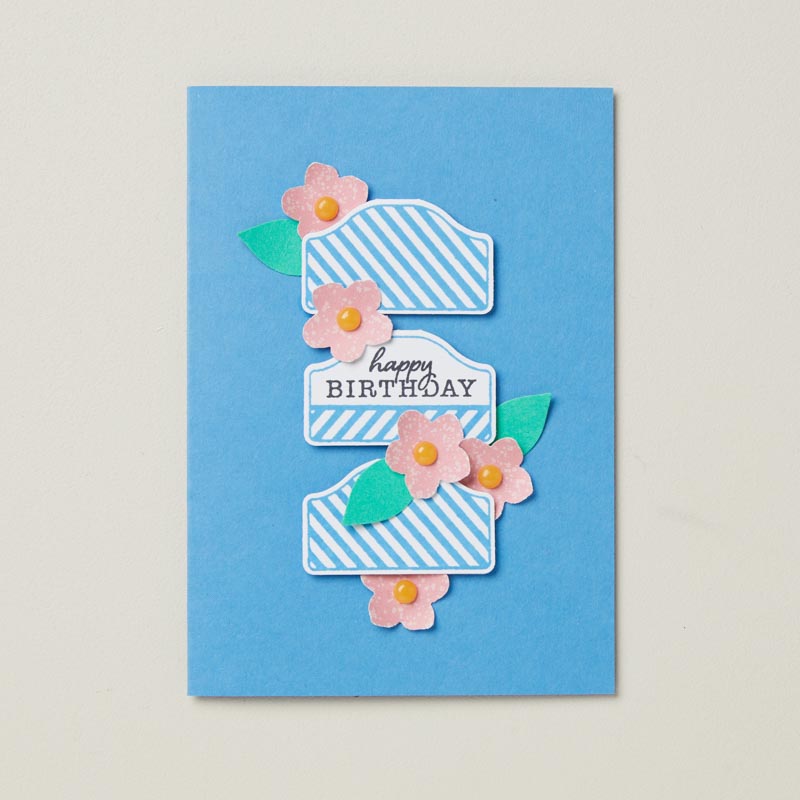
Ideas for Basic DIY Birthday Cards
Now that you’ve got your supplies and your theme locked down, it’s time to start creating your own birthday cards! Follow this simple four-step process, and you’ll be a cardmaking pro in no time.
First, you’ll create your homemade birthday card’s base. Next, you’ll layer on designer series paper. After that, you’ll add a sentiment. Finally, you’ll finish your design with embellishments and those truly personal touches to your birthday card.
Planning Your Birthday Card Layout
Planning your layout can be the most intimidating part of creating your own birthday cards, even for really experienced crafters! As a beginner, you’ll want to start with a fairly simple layout until you understand the principles and are comfortable enough to use more complicated techniques. There is zero shame in finding a layout that you love and recreating it time and time again with a new color theme, different designer papers, and a unique stamped message—it’s a brand new card every single time! A simple handmade card can convey just as much sentiment as a complex one.
But for those who crave a little more variety, mixing things up is great, too. And for that reason, we love to keep a few favorite layouts on hand, just as starting points for each new homemade birthday card. If you’re feeling adventurous, check out the layout options below. Each outline can represent paper, a stamp, a piece of ribbon, or anything else you want to add to your birthday card! Just let your imagination do its thing. Oh, and remember, little “mistakes” are easily fixed by adding a layer of paper, an embellishment, or simply incorporating them into your design. No harm done!
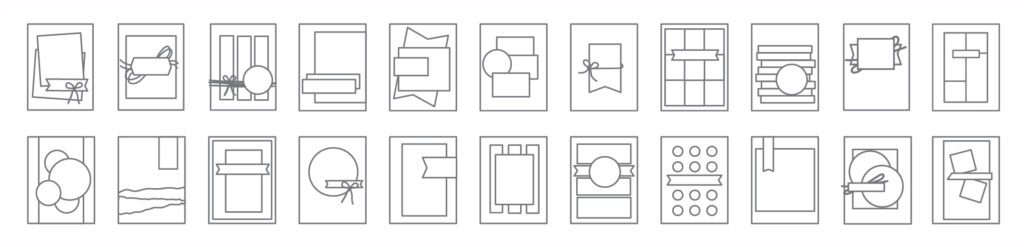
This phase of the cardmaking process will also include choosing your color scheme or any other thematic elements you want to include. For example, is there a paper you’ve got that you know your mother-in-law would absolutely love? Now is the time to make sure you’ve got it and any other coordinating elements on hand.
Step 1: Creating The Card Base
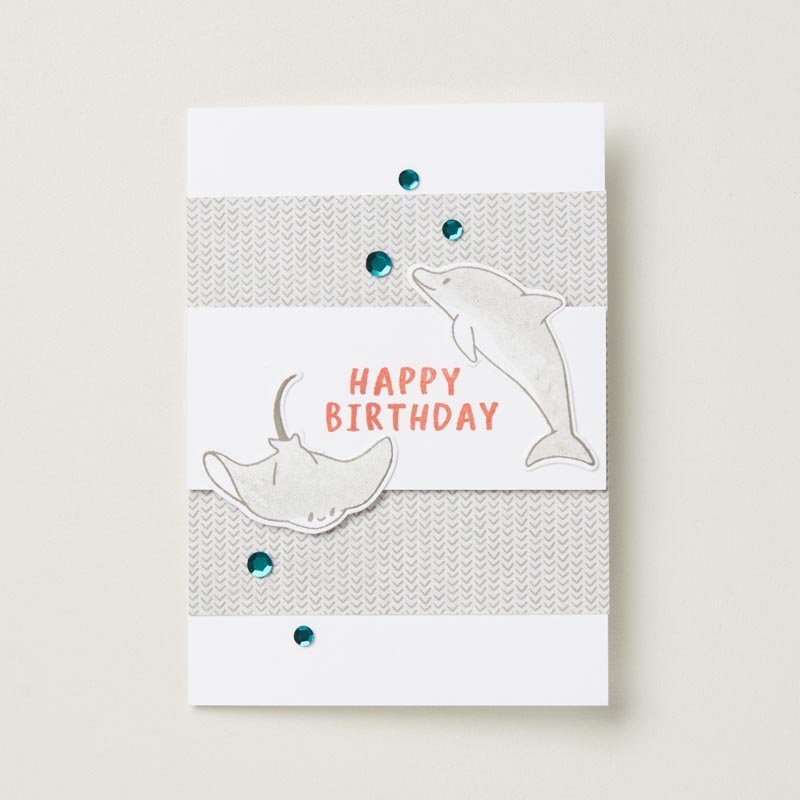
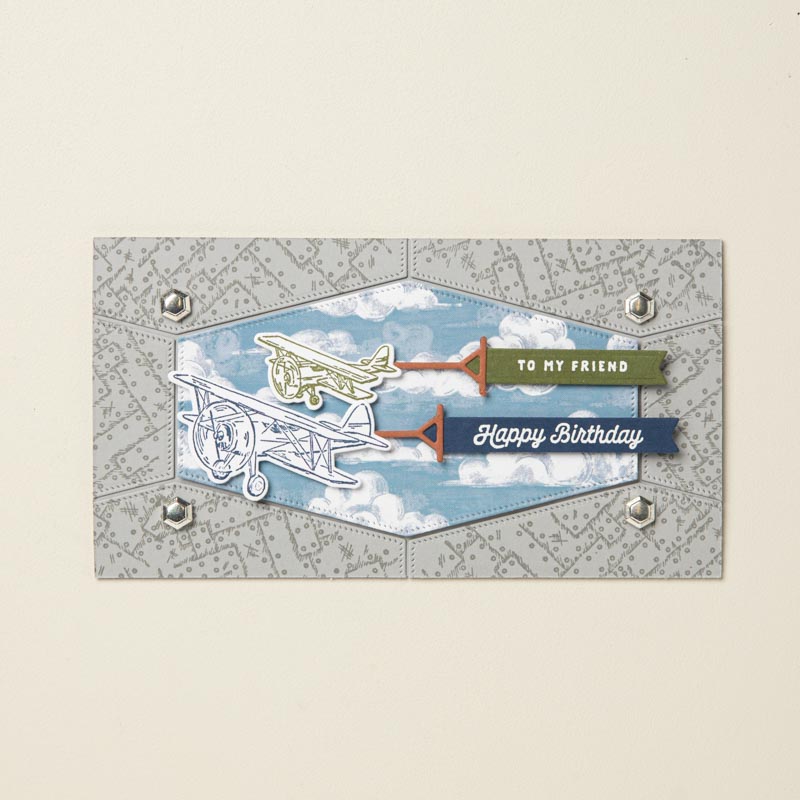
Creating your card base is the first big hands-on moment in making your own birthday card. Most crafters will use sturdy (but not overly heavy or textured) cardstock for this. While you can use any color that works within your chosen scheme, white is a favorite for sure—consider it a blank canvas on which to work and a crisp spot to write your heartfelt message on the inside of the card. If you’d like to jump right into decorating your card, you can always start with our basic white notecards and envelopes.
Once you’ve chosen your paper, you need to cut it to the right size. A basic pair of scissors or a crafting knife paired with a ruler can work for this, but a paper trimmer is the best tool for making nice, straight lines. A common size for handmade birthday cards is 4.25”x5.5” and can easily be achieved by cutting an 8.5”x11” or A4 sheet of cardstock in half widthwise. Use the scoring blade on the Paper Trimmer to score your card base halfway along the length and then fold. Using a bone folder (or just a smooth-sided pen) can be helpful to crease the folded edge nicely and not end up with ripples or even tears in your cardstock. You can also simplify this step by keeping some blank white cards and envelopes on hand.
Step 2: Adding Design Layers
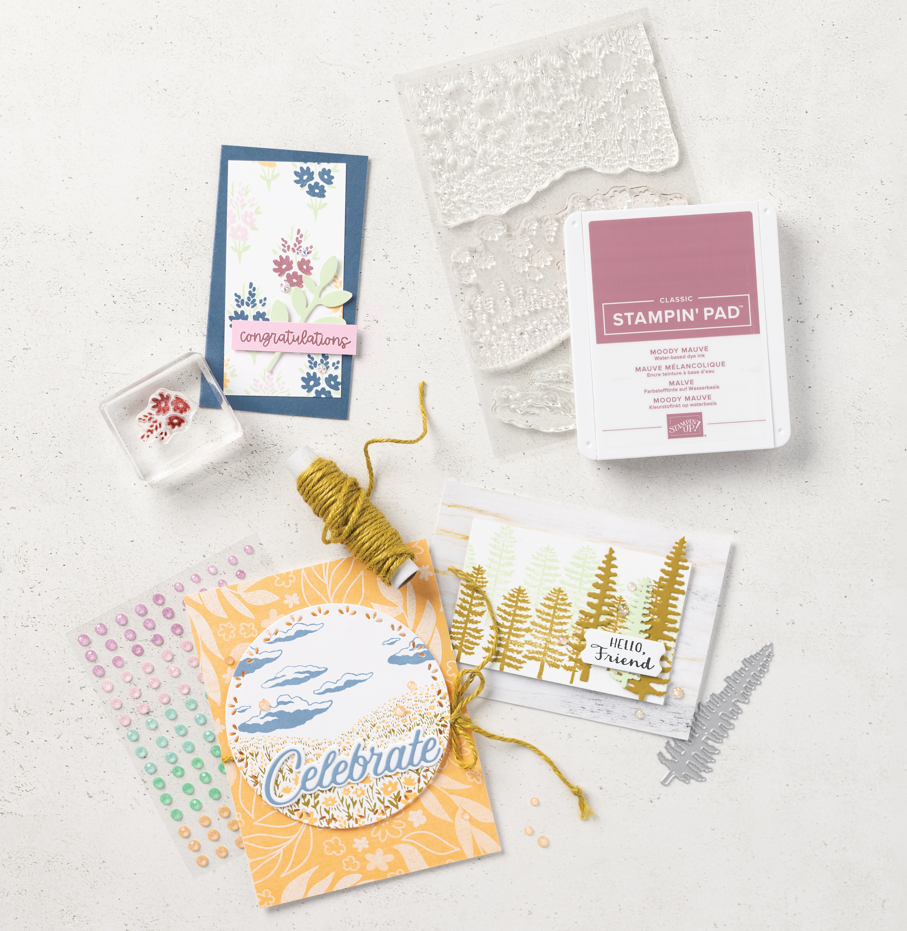
Once you have prepared your card base, you can start layering your paper elements. For a beginner, that may mean picking a single piece of Designer Series Paper, trimming it a bit smaller than your card base, and adhering it to the front.
If your card is more involved and uses stacking layers or papers arranged in a particular design, you want to make sure the papers you’ve chosen are well-coordinated and work well in whatever role they’re given. For instance, a super busy print may not be the best to place directly beneath a stamped sentiment but would look great as a background element directly on top of your card base, allowing more important elements some space to shine.
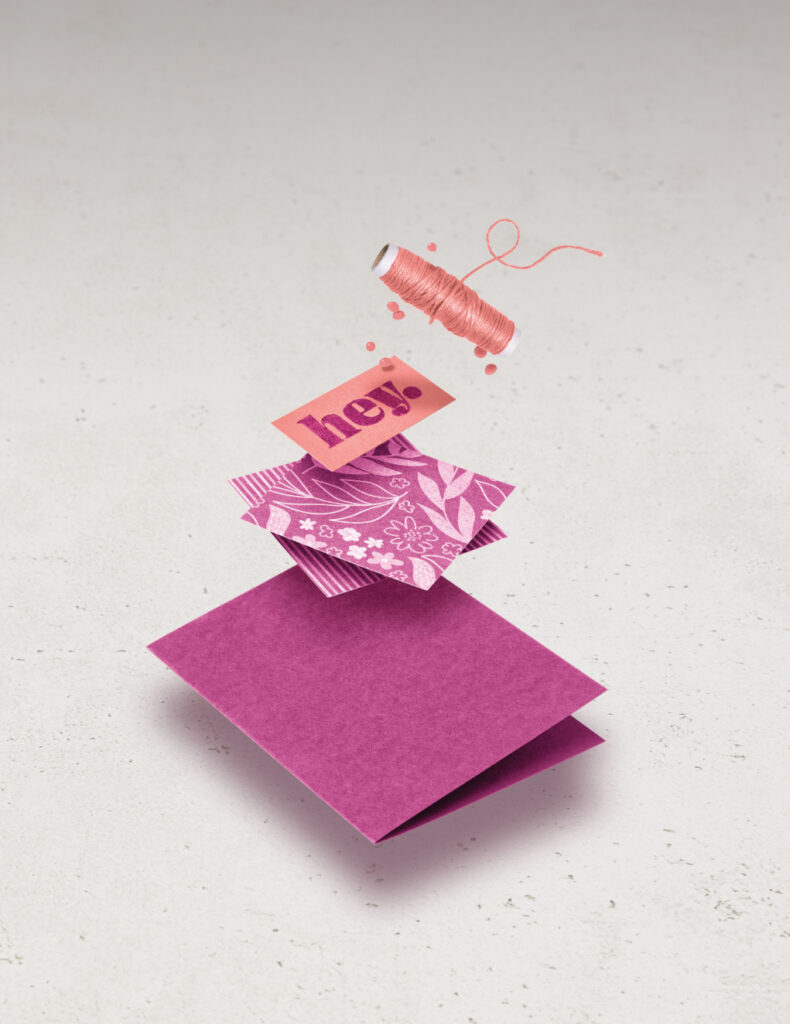
Coordinating your paper’s patterns, textures, and colors can take some practice, but it is a fun part of making your own birthday cards. Remember, unique and unexpected combinations can make a great visual, so play around with the styles and designs you like together. If you need a little more direction, Stampin’ Up! has made it incredibly easy to coordinate colors and patterns using our color collections in Brights, Regals, Subtles, and Neutrals, along with our Designer Series Paper, the designs of which harmonize beautifully with different color families.
Now that you have your papers picked out look back at your layout from step one and see where each paper might work well. Layer and relayer until you find a cohesive fit for your card. And remember, decide what will go where before cutting. The old adage “measure twice, cut once” applies here in terms of visual choices, too—not just actual sizing.
Step 3: Personalizing Your Card
As you’ve worked to create your own birthday card, its color scheme, paper patterns, and general design will likely already reflect your style and that of your loved one. But now it’s time to make it truly personal by adding a greeting or sentiment! You can do this using themed stamps and ink or color-coordinated markers. You can craft a message intended just for the recipient, or you can print or handwrite a message. Whichever method you choose, we recommend placing your greeting on a paper and then cutting it out and adding it as a layered element to your design. That way, if you mess up, you can do it again without needing to remake the whole card.
And just because you’re making a birthday card doesn’t mean you’re limited to simply saying “Happy Birthday!” So many ready-to-stamp phrases send a message of kindness, care, and celebration on their special day that you don’t need to feel stuck with just the basics. Again, think in terms of the particular friend or family member, but you may want to consider adding phrases like, “I hope your day is filled with joy,” “Make a wish,” or “Hope your birthday is wild!”.
Step 4: Embellishing Your Card
Gather together any ribbons or twine that may match, jewels, and other dimensional elements that will give your handmade birthday card design that perfectly personalized and cohesive look. Again, refer back to your chosen layout to see where these components will fit well.
Another popular saying that might be helpful here is, “Before you leave the house, look in the mirror and remove one accessory.” The idea is usually that less is more. That said, every unique birthday card and the individual it’s being created for will have their own sense of how much is enough. So, if it feels right not to hold back once in a while, trust your gut and go a little extra. It never hurt anybody in the cardmaking world!
Become The Ultimate Birthday Card Creator
Making your own birthday cards is a gift—for both the receiver and you! Why not indulge in the fun and creative process that produces such a unique and memorable way of showing someone you care about on their special day?
Just remember, as you get started—follow the basic card-making steps and then experiment with a variety of designs to gain confidence in your own creative style. Then, be sure to share your creations with the world! Every (birth)day will be better for it.
Want to shop for a few supplies today? Check out the collections of paper, stamps, ink, and embellishments over at Stampin’ Up! now!
Want a little more guidance? Connect with someone from our community of Stampin’ Up! demonstrators today!
Not all products may be available. Please contact a demonstrator for additional options.